Ubuntu 22.04에 NetBox 네트워크 문서 및 관리 도구를 설치하는 방법
이 페이지에서
- 전제 조건
- 1단계 - 방화벽 구성\n
- 2단계 - PostgreSQL 설치 및 구성
- 3단계 - Redis 설치 및 구성
- 4단계 - NetBox 다운로드
- 5단계 - NetBox 구성
- 6단계 - NetBox 설치
- 7단계 - Gunicorn 구성 및 서비스 파일 생성
- 8단계 - Nginx 설치
- 9단계 - SSL 설치
- 10단계 - Nginx 구성
- 11단계 - NetBox 업그레이드
- 결론
NetBox는 컴퓨터 네트워크와 IP 주소를 관리하고 문서화하는 데 사용되는 오픈 소스 IP 주소(IPAM) 및 데이터 센터 인프라 관리(DCIM) 웹 애플리케이션입니다. DigitalOcean의 네트워크 엔지니어링 팀은 처음에 이를 구상했습니다. Django Python 프레임워크를 사용하여 작성되었으며 데이터 저장을 위해 PostgreSQL 데이터베이스를 사용합니다. 또한 쿼리 캐싱을 위해 Redis 데이터베이스를 사용합니다.
이 튜토리얼은 NetBox 도구를 Ubuntu 22.04 서버에 설치하고 Nginx를 리버스 프록시 서버로 설치하는 방법을 알려줍니다.
전제 조건
-
A server running Ubuntu 22.04.
-
A non-root user with sudo privileges.
-
A fully qualified domain name (FQDN) like
netbox.example.com. -
Make sure everything is updated.
$ sudo apt update
$ sudo apt upgrade
-
Few packages that your system needs.
$ sudo apt install wget curl nano software-properties-common dirmngr apt-transport-https gnupg2 ca-certificates lsb-release ubuntu-keyring unzip -y
Some of these packages may already be installed on your system.
1단계 - 방화벽 구성
첫 번째 단계는 방화벽을 구성하는 것입니다. 우분투는 기본적으로 ufw(복잡하지 않은 방화벽)와 함께 제공됩니다.
방화벽이 실행 중인지 확인하십시오.
$ sudo ufw status
다음 출력을 얻어야 합니다.
Status: inactive
방화벽이 활성화 시 현재 연결을 끊지 않도록 SSH 포트를 허용합니다.
$ sudo ufw allow OpenSSH
HTTP 및 HTTPS 포트도 허용합니다.
$ sudo ufw allow http
$ sudo ufw allow https
방화벽 활성화
$ sudo ufw enable
Command may disrupt existing ssh connections. Proceed with operation (y|n)? y
Firewall is active and enabled on system startup
방화벽의 상태를 다시 확인하십시오.
$ sudo ufw status
비슷한 출력이 표시되어야 합니다.
Status: active

To                         Action      From
--                         ------      ----
OpenSSH                    ALLOW       Anywhere
80/tcp                     ALLOW       Anywhere
443                        ALLOW       Anywhere
OpenSSH (v6)               ALLOW       Anywhere (v6)
80/tcp (v6)                ALLOW       Anywhere (v6)
443 (v6)                   ALLOW       Anywhere (v6)
2단계 - PostgreSQL 설치 및 구성
NetBox는 PostgreSQL 11 이상에서 작동합니다. Ubuntu 22.04는 기본적으로 PostgreSQL 14와 함께 제공됩니다. 자습서에 PostgreSQL 15를 사용합니다.
다음 명령을 실행하여 PostgreSQL GPG 키를 추가합니다.
$ curl https://www.postgresql.org/media/keys/ACCC4CF8.asc | gpg --dearmor | sudo tee /usr/share/keyrings/postgresql-key.gpg >/dev/null
소스 목록에 APT 저장소를 추가하십시오.
$ sudo sh -c 'echo "deb [signed-by=/usr/share/keyrings/postgresql-key.gpg arch=amd64] http://apt.postgresql.org/pub/repos/apt $(lsb_release -cs)-pgdg main" > /etc/apt/sources.list.d/pgdg.list'
시스템 저장소를 업데이트하십시오.
$ sudo apt update
이제 아래 명령을 사용하여 PostgreSQL을 설치할 수 있습니다.
$ sudo apt install postgresql postgresql-contrib
postgresql-contrib 패키지에는 몇 가지 추가 유틸리티가 포함되어 있습니다.
PostgreSQL 서비스의 상태를 확인하십시오.
$ sudo systemctl status postgresql
? postgresql.service - PostgreSQL RDBMS
     Loaded: loaded (/lib/systemd/system/postgresql.service; enabled; vendor preset: enabled)
     Active: active (exited) since Tue 2022-11-27 9:10:35 UTC; 5s ago
    Process: 30544 ExecStart=/bin/true (code=exited, status=0/SUCCESS)
   Main PID: 30544 (code=exited, status=0/SUCCESS)
        CPU: 2ms

Dec 27 9:10:35 netbox systemd[1]: Starting PostgreSQL RDBMS...
Dec 27 9:10:35 netbox systemd[1]: Finished PostgreSQL RDBMS.
서비스가 기본적으로 활성화되어 실행되고 있음을 알 수 있습니다.
PostgreSQL 셸을 시작합니다.
$ sudo -i -u postgres psql
NetBox 데이터베이스를 생성합니다.
postgres=# CREATE DATABASE netbox;
NetBox 사용자를 생성하고 강력한 암호를 선택하십시오.
postgres-# CREATE USER netbox WITH PASSWORD 'Your_Password';
데이터베이스 소유자를 NetBox 사용자로 변경합니다.
postgres-# ALTER DATABASE netbox OWNER TO netbox;
쉘을 종료합니다.
postgres-# \q
자격 증명이 작동하는지 확인합니다.
$ psql --username netbox --password --host localhost netbox
Password for user netbox:
psql (15.1 (Ubuntu 15.1-1.pgdg22.04+1))
SSL connection (protocol: TLSv1.3, cipher: TLS_AES_256_GCM_SHA384, bits: 256, compression: off)
Type "help" for help.

netbox=>
\\q를 입력하여 셸을 종료합니다.
3단계 - Redis 설치 및 구성
Ubuntu는 Redis 6.0.16과 함께 제공됩니다. 튜토리얼에서는 공식 저장소에서 최신 버전을 설치합니다.
공식 Redis GPG 키를 가져옵니다.
$ curl -fsSL https://packages.redis.io/gpg | sudo gpg --dearmor -o /usr/share/keyrings/redis-archive-keyring.gpg
소스 목록에 APT 저장소를 추가하십시오.
echo "deb [signed-by=/usr/share/keyrings/redis-archive-keyring.gpg] https://packages.redis.io/deb $(lsb_release -cs) main" | sudo tee /etc/apt/sources.list.d/redis.list
시스템 저장소 목록을 업데이트하십시오.
$ sudo apt update
다음 명령을 실행하여 Redis 서버를 설치하십시오.
$ sudo apt install redis
Redis 버전을 확인합니다.
$ redis-server -v
Redis server v=7.0.7 sha=00000000:0 malloc=jemalloc-5.2.1 bits=64 build=2260280010e18db8
다음 명령을 사용하여 서비스 연결을 확인하십시오.
$ redis-cli
Redis 셸로 전환됩니다.
첫 번째 단계는 Redis 기본 사용자의 비밀번호를 설정하는 것입니다. Your_Redis_Password를 선택한 강력한 비밀번호로 바꾸십시오.
127.0.0.1:6379> acl setuser default >Your_Redis_Password
Redis 인증을 테스트합니다.
127.0.0.1:6379> AUTH Your_Redis_Password
OK
서비스를 핑합니다.
127.0.0.1:6379> ping
PONG
exit를 입력하여 서비스를 종료합니다.
4단계 - NetBox 다운로드
NetBox가 작동하려면 Python Django가 필요합니다. NetBox 설치의 첫 번째 단계는 필요한 Python 패키지를 설치하는 것입니다. 다음 명령을 실행하여 필요한 Python 패키지를 설치합니다.
$ sudo apt install -y python3 python3-pip python3-venv python3-dev build-essential libxml2-dev libxslt1-dev libffi-dev libpq-dev libssl-dev zlib1g-dev
파이썬 버전을 확인하십시오.
$ python3 -V
Python 3.10.6
NetBox 설치를 위한 기본 디렉토리를 생성합니다.
$ sudo mkdir -p /opt/netbox/
디렉터리로 전환합니다.
$ cd /opt/netbox
NetBoxs GitHub 리포지토리의 마스터 분기를 현재 디렉터리에 복제합니다.
$ sudo git clone -b master --depth 1 https://github.com/netbox-community/netbox.git .
--depth 1 플래그는 리포지토리의 가장 최근 커밋만 검색합니다. 전체 커밋 기록을 다운로드하려면 플래그를 생략할 수 있습니다.
릴리스 페이지에서 NetBox의 최신 버전을 확인하고 Git을 사용하여 확인하십시오. 튜토리얼을 작성할 당시에는 3.4.1이 최신 버전이었습니다.
$ git config --global --add safe.directory /opt/netbox
$ sudo git checkout v3.4.1
확인하기 전에 Gits 안전 디렉터리 목록에 디렉터리를 추가해야 합니다. 이것은 최신 Git 버전에서 사용할 수 있는 새로운 보안 기능입니다.
다음 단계는 NetBox에 대한 시스템 사용자 및 그룹을 생성하는 것입니다.
$ sudo adduser --system --group netbox
NetBoxs 미디어 디렉토리에 대한 사용자 권한을 부여하십시오.
$ sudo chown --recursive netbox /opt/netbox/netbox/media/
5단계 - NetBox 구성
NetBox 구성 디렉토리로 전환합니다.
$ cd /opt/netbox/netbox/netbox/
예제 구성 파일을 복사하여 실제 파일을 생성합니다.
$ sudo cp configuration_example.py configuration.py
구성을 진행하기 전에 NetBox용 비밀 키를 생성해야 합니다. 구성에 필요하므로 키를 기록해 둡니다.
$ python3 ../generate_secret_key.py
dSSWi$Ar2cVvu1)V!B82sY1tJAQK9r)^+$=1+(
편집을 위해 구성 파일을 엽니다.
$ sudo nano configuration.py
ALLOWED_HOSTS 변수를 찾아 값을 다음과 같이 설정합니다. 이 변수는 이 서버에 도달할 수 있는 유효한 호스트 이름 및 IP 주소 목록을 보유합니다.
ALLOWED_HOSTS = ['netbox.example.com', '<yourserverIP>']
다음 단계는 데이터베이스 세부 정보를 편집하는 것입니다. 다음과 같이 데이터베이스 세부 정보를 구성합니다.
DATABASE = {
    'NAME': 'netbox',              # Database name
    'USER': 'netbox',              # PostgreSQL username
    'PASSWORD': 'Your_Password',   # PostgreSQL password
    'HOST': 'localhost',           # Database server
    'PORT': '',                    # Database port (leave blank for default)
    'CONN_MAX_AGE': 300,           # Max database connection age
}
표시된 대로 Redis 구성을 구성합니다. 3단계에서 설정한 Redis 비밀번호를 입력합니다.
REDIS = {
    'tasks': {
        'HOST': 'localhost',
        'PORT': 6379,
        # Comment out `HOST` and `PORT` lines and uncomment the following if using Redis Sentinel
        # 'SENTINELS': [('mysentinel.redis.example.com', 6379)],
        # 'SENTINEL_SERVICE': 'netbox',
        'PASSWORD': 'Your_Redis_Password',
        'DATABASE': 0,
        'SSL': False,
        # Set this to True to skip TLS certificate verification
        # This can expose the connection to attacks, be careful
        # 'INSECURE_SKIP_TLS_VERIFY': False,
    },
    'caching': {
        'HOST': 'localhost',
        'PORT': 6379,
        # Comment out `HOST` and `PORT` lines and uncomment the following if using Redis Sentinel
        # 'SENTINELS': [('mysentinel.redis.example.com', 6379)],
        # 'SENTINEL_SERVICE': 'netbox',
        'PASSWORD': 'Your_Redis_Password',
        'DATABASE': 1,
        'SSL': False,
        # Set this to True to skip TLS certificate verification
        # This can expose the connection to attacks, be careful
        # 'INSECURE_SKIP_TLS_VERIFY': False,
    }
}
비밀 키 값을 변수에 추가합니다.
SECRET_KEY = 'dSSWi$Ar2cVvu1)V!B82sY1tJAQK9r)^+$=1+('
기본적으로 NetBox는 로컬 파일 시스템을 사용하여 업로드된 파일을 저장합니다. django-storages 라이브러리를 설치하여 원격 파일 시스템에 파일을 저장할 수 있습니다. 다음 명령을 실행하여 django-storages 패키지를 NetBoxs requirements.txt에 추가하면 이후 단계에서 설치됩니다. 또한 스토리지 매개변수를 구성해야 합니다. 구성 파일의 스토리지 섹션의 주석을 해제하고 다음과 같이 진행하십시오.
STORAGE_BACKEND = 'storages.backends.s3boto3.S3Boto3Storage'
STORAGE_CONFIG = {
    'AWS_ACCESS_KEY_ID': 'Key ID',
    'AWS_SECRET_ACCESS_KEY': 'Secret',
    'AWS_STORAGE_BUCKET_NAME': 'netbox',
    'AWS_S3_REGION_NAME': 'eu-west-1',
}
FTP, SFTP, Dropbox 및 기타 S3 공급자를 포함한 다른 스토리지 유형도 지원됩니다. 구성 방법을 알아보려면 django-storages 도움말 페이지를 읽어보세요.
Ctrl + X를 누르고 메시지가 표시되면 Y를 입력하여 파일을 저장합니다.
6단계 - NetBox 설치
NetBox 업그레이드 스크립트를 실행합니다.
$ sudo /opt/netbox/upgrade.sh
업그레이드 스크립트는 다음 작업을 수행합니다.
- Python 가상 환경 만들기\n
- 필요한 모든 Python 패키지를 설치합니다.\n
- 데이터베이스 스키마 마이그레이션 실행\n
- 로컬에서 문서 작성(오프라인용)\n
- 디스크의 정적 리소스 파일 집계
업그레이드 스크립트로 생성된 가상 환경을 활성화합니다.
$ source /opt/netbox/venv/bin/activate
다음 단계는 NetBox에 액세스할 수 있는 수퍼유저를 만드는 것입니다. 그러나 먼저 필요한 디렉토리로 전환하십시오.
(venv) $ cd /opt/netbox/netbox
수퍼유저를 만듭니다.
(venv) $ python3 manage.py createsuperuser
다음과 같은 결과가 표시됩니다.
Username (leave blank to use 'navjot'):
Email address:
Password:
Password (again):
Superuser created successfully.
NetBox에는 이전 세션 및 만료된 변경 기록 지우기와 같은 반복적인 정리 작업을 처리하는 하우스키핑 관리 명령이 포함되어 있습니다. 명령을 수동으로 실행하거나 cron을 사용하여 정기적으로 실행할 수 있습니다. NetBox는 하우스키핑 작업을 실행하는 셸 스크립트를 제공합니다. 다음 명령을 실행하여 Cron daily 디렉터리에 스크립트에 대한 소프트 링크를 만듭니다. 이렇게 하면 명령이 매일 실행됩니다.
(venv) $ sudo ln -s /opt/netbox/contrib/netbox-housekeeping.sh /etc/cron.daily/netbox-housekeeping
마지막 단계는 NetBox 응용 프로그램이 작동하는지 테스트하는 것입니다. 그러나 먼저 테스트를 위해 포트 8000을 열어야 합니다. 그래도 모든 포트를 사용할 수 있습니다.
(venv) $ sudo ufw allow 8000
NetBox의 개발 인스턴스를 시작합니다.
(venv) $ python3 manage.py runserver 0.0.0.0:8000 --insecure
성공하면 다음 출력이 표시됩니다.
Performing system checks...

System check identified no issues (0 silenced).
December 27, 2022 - 09:27:37
Django version 4.1.4, using settings 'netbox.settings'
Starting development server at http://0.0.0.0:8000/
Quit the server with CONTROL-C.
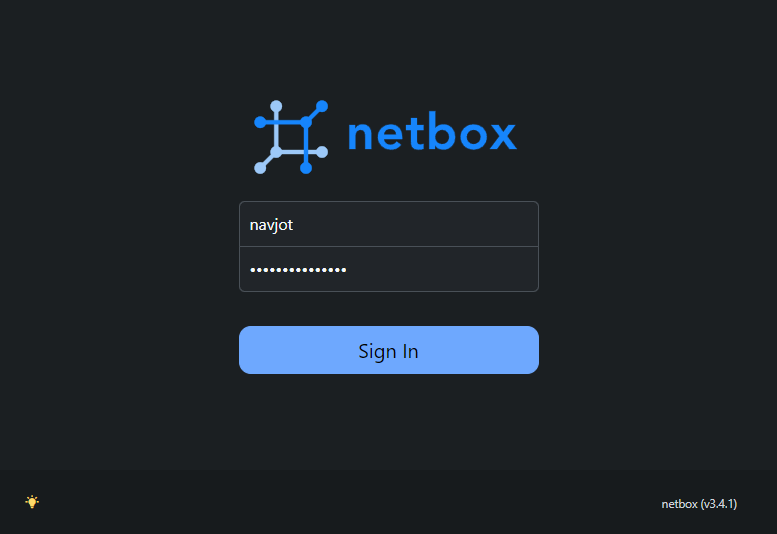
URL http://을 통해 NetBox에 액세스할 수 있어야 합니다. 다음 화면이 나타납니다.

로그인 버튼을 클릭하여 로그인 페이지를 열고 이전에 만든 수퍼유저 자격 증명을 입력합니다.
NetBox 대시보드로 돌아갑니다.
Ctrl + C 키를 눌러 서버를 중지합니다. Python 가상 환경을 비활성화합니다.
(venv) $ deactivate
7단계 - Gunicorn 구성 및 서비스 파일 생성
NetBox는 HTTP 서버 뒤에서 WSGI 애플리케이션으로 실행됩니다. NetBox는 자동으로 Gunicorn 서버를 설치합니다. 이 단계에서는 Gunicorn을 구성하고 NetBox용 서비스 파일을 생성하여 시스템 재부팅 시 백그라운드에서 실행할 수 있도록 합니다.
NetBox는 기본 Gunicorn 구성 파일과 함께 제공됩니다. 그것의 사본을 만드십시오.
$ sudo cp /opt/netbox/contrib/gunicorn.py /opt/netbox/gunicorn.py
기본 구성은 우리의 목적에 충분해야 합니다. 필요에 따라 파일을 편집하여 호스트 이름 및 포트 번호를 변경하거나 스레드, 작업자 및 요청 수를 변경하여 성능을 향상시킬 수 있습니다.
다음 단계는 NetBox 및 Gunicorn 서비스 파일을 모두 /etc/systemd/system 디렉터리에 복사하는 것입니다.
$ sudo cp -v /opt/netbox/contrib/*.service /etc/systemd/system/
서비스 데몬을 다시 로드합니다.
$ sudo systemctl daemon-reload
netbox 및 netbox-rq 서비스를 시작하고 활성화합니다.
$ sudo systemctl start netbox netbox-rq
$ sudo systemctl enable netbox netbox-rq
WSGI 서비스의 상태를 확인하십시오.
$ sudo systemctl status netbox
비슷한 출력을 얻을 수 있습니다.
? netbox.service - NetBox WSGI Service
     Loaded: loaded (/etc/systemd/system/netbox.service; enabled; vendor preset: enabled)
     Active: active (running) since Tue 2022-12-27 09:28:23 UTC; 17s ago
       Docs: https://docs.netbox.dev/
   Main PID: 4180 (gunicorn)
      Tasks: 6 (limit: 1030)
     Memory: 357.9M
        CPU: 7.747s
     CGroup: /system.slice/netbox.service
             ??4180 /opt/netbox/venv/bin/python3 /opt/netbox/venv/bin/gunicorn --pid /var/tmp/netbox.pid --pythonpath /opt/netbox/netbox --config /opt/netbox/gunicorn.py netbox.wsgi
             ??4181 /opt/netbox/venv/bin/python3 /opt/netbox/venv/bin/gunicorn --pid /var/tmp/netbox.pid --pythonpath /opt/netbox/netbox --config /opt/netbox/gunicorn.py netbox.wsgi
             ??4182 /opt/netbox/venv/bin/python3 /opt/netbox/venv/bin/gunicorn --pid /var/tmp/netbox.pid --pythonpath /opt/netbox/netbox --config /opt/netbox/gunicorn.py netbox.wsgi
             ??4183 /opt/netbox/venv/bin/python3 /opt/netbox/venv/bin/gunicorn --pid /var/tmp/netbox.pid --pythonpath /opt/netbox/netbox --config /opt/netbox/gunicorn.py netbox.wsgi
             ??4184 /opt/netbox/venv/bin/python3 /opt/netbox/venv/bin/gunicorn --pid /var/tmp/netbox.pid --pythonpath /opt/netbox/netbox --config /opt/netbox/gunicorn.py netbox.wsgi
             ??4185 /opt/netbox/venv/bin/python3 /opt/netbox/venv/bin/gunicorn --pid /var/tmp/netbox.pid --pythonpath /opt/netbox/netbox --config /opt/netbox/gunicorn.py netbox.wsgi

Dec 27 09:28:23 netbox systemd[1]: Started NetBox WSGI Service.
Dec 27 09:28:24 netbox gunicorn[4180]: [2022-12-27 09:28:24 +0000] [4180] [INFO] Starting gunicorn 20.1.0
Dec 27 09:28:24 netbox gunicorn[4180]: [2022-12-27 09:28:24 +0000] [4180] [INFO] Listening at: http://127.0.0.1:8001 (4180)
Dec 27 09:28:24 netbox gunicorn[4180]: [2022-12-27 09:28:24 +0000] [4180] [INFO] Using worker: gthread
Dec 27 09:28:24 netbox gunicorn[4181]: [2022-12-27 09:28:24 +0000] [4181] [INFO] Booting worker with pid: 4181
Dec 27 09:28:24 netbox gunicorn[4182]: [2022-12-27 09:28:24 +0000] [4182] [INFO] Booting worker with pid: 4182
Dec 27 09:28:24 netbox gunicorn[4183]: [2022-12-27 09:28:24 +0000] [4183] [INFO] Booting worker with pid: 4183
Dec 27 09:28:24 netbox gunicorn[4184]: [2022-12-27 09:28:24 +0000] [4184] [INFO] Booting worker with pid: 4184
Dec 27 09:28:24 netbox gunicorn[4185]: [2022-12-27 09:28:24 +0000] [4185] [INFO] Booting worker with pid: 4185
보시다시피 Gunicorn은 기본적으로 포트 8001에서 수신 대기합니다. 이 정보는 Nginx를 리버스 프록시 서버로 구성할 때 유용합니다.
8단계 - Nginx 설치
Ubuntu 22.04는 이전 버전의 Nginx와 함께 제공됩니다. 최신 버전을 설치하려면 공식 Nginx 저장소를 다운로드해야 합니다.
Nginxs 서명 키를 가져옵니다.
$ curl https://nginx.org/keys/nginx_signing.key | gpg --dearmor \
	| sudo tee /usr/share/keyrings/nginx-archive-keyring.gpg >/dev/null
Nginxs 안정 버전용 리포지토리를 추가합니다.
$ echo "deb [signed-by=/usr/share/keyrings/nginx-archive-keyring.gpg arch=amd64] \
http://nginx.org/packages/ubuntu `lsb_release -cs` nginx" \
    | sudo tee /etc/apt/sources.list.d/nginx.list
시스템 리포지토리를 업데이트합니다.
$ sudo apt update
Nginx를 설치합니다.
$ sudo apt install nginx
설치를 확인하십시오.
$ nginx -v
nginx version: nginx/1.22.1
Nginx 서버를 시작합니다.
$ sudo systemctl start nginx
9단계 - SSL 설치
SSL 인증서를 생성하려면 Certbot을 설치해야 합니다. Ubuntus 저장소를 사용하여 Certbot을 설치하거나 Snapd 도구를 사용하여 최신 버전을 가져올 수 있습니다. 우리는 Snapd 버전을 사용할 것입니다.
Ubuntu 22.04는 기본적으로 Snapd가 설치된 상태로 제공됩니다. 다음 명령을 실행하여 Snapd 버전이 최신인지 확인하십시오. Snapd 버전이 최신인지 확인하세요.
$ sudo snap install core
$ sudo snap refresh core
Certbot을 설치합니다.
$ sudo snap install --classic certbot
다음 명령을 사용하여 /usr/bin 디렉터리에 대한 심볼릭 링크를 생성하여 Certbot 명령이 실행되도록 합니다.
$ sudo ln -s /snap/bin/certbot /usr/bin/certbot
다음 명령을 실행하여 SSL 인증서를 생성합니다.
$ sudo certbot certonly --nginx --agree-tos --no-eff-email --staple-ocsp --preferred-challenges http -m -d netbox.example.com
위의 명령은 서버의 /etc/letsencrypt/live/netbox.example.com 디렉토리에 인증서를 다운로드합니다.
Diffie-Hellman 그룹 인증서를 생성합니다.
$ sudo openssl dhparam -dsaparam -out /etc/ssl/certs/dhparam.pem 4096
SSL 갱신이 제대로 작동하는지 확인하려면 프로세스를 시험 실행하십시오.
$ sudo certbot renew --dry-run
오류가 표시되지 않으면 모든 설정이 완료된 것입니다. 인증서가 자동으로 갱신됩니다.
10단계 - Nginx 구성
편집을 위해 /etc/nginx/nginx.conf 파일을 엽니다.
$ sudo nano /etc/nginx/nginx.conf
include /etc/nginx/conf.d/*.conf; 줄 앞에 다음 줄을 추가합니다.
server_names_hash_bucket_size 64;
Ctrl + X를 누르고 메시지가 표시되면 Y를 입력하여 파일을 저장합니다.
편집을 위해 /etc/nginx/conf.d/netbox.conf 파일을 만들고 엽니다.
$ sudo nano /etc/nginx/conf.d/netbox.conf
다음 코드를 붙여넣습니다.
server {
  # Redirect any http requests to https
  listen         80;
  listen         [::]:80;
  server_name    netbox.example.com;
  return 301     https://$host$request_uri;
}

server {
  listen                    443 ssl http2;
  listen                    [::]:443 ssl http2;
  server_name               netbox.example.com;

  access_log                /var/log/nginx/netbox.access.log;
  error_log                 /var/log/nginx/netbox.error.log;

  # TLS configuration
  ssl_certificate           /etc/letsencrypt/live/netbox.example.com/fullchain.pem;
  ssl_certificate_key       /etc/letsencrypt/live/netbox.example.com/privkey.pem;
  ssl_trusted_certificate   /etc/letsencrypt/live/netbox.example.com/chain.pem;
  ssl_protocols             TLSv1.2 TLSv1.3;

  ssl_ciphers 'ECDHE-ECDSA-AES256-GCM-SHA384:ECDHE-RSA-AES256-GCM-SHA384:ECDHE-ECDSA-CHACHA20-POLY1305:ECDHE-RSA-CHACHA20-POLY1305:ECDHE-ECDSA-AES256-SHA384:ECDHE-RSA-AES256-SHA384';
  ssl_prefer_server_ciphers on;
  ssl_session_cache         shared:SSL:50m;
  ssl_session_timeout       1d;

  # OCSP Stapling ---
  # fetch OCSP records from URL in ssl_certificate and cache them
  ssl_stapling on;
  ssl_stapling_verify on;
  ssl_dhparam /etc/ssl/certs/dhparam.pem;

  client_max_body_size 25m;

  # Proxy everything over to the netbox server
  location /static/ {
    alias /opt/netbox/netbox/static/;
  }

  location / {
    proxy_set_header        X-Real-IP $remote_addr;
    proxy_set_header        X-Forwarded-Proto $scheme;
    proxy_set_header	    X-Forwarded-Host $http_host;
    proxy_pass              http://127.0.0.1:8001;
  }
}
완료되면 Ctrl + X를 누르고 프롬프트가 표시되면 Y를 입력하여 파일을 저장합니다.
Nginx 구성 파일 구문을 확인합니다.
$ sudo nginx -t
nginx: the configuration file /etc/nginx/nginx.conf syntax is ok
nginx: configuration file /etc/nginx/nginx.conf test is successful
Nginx 서비스를 다시 시작합니다.
$ sudo systemctl restart nginx
이제 URL https://netbox.example.com을 통해 NetBox 대시보드에 액세스할 수 있습니다.
11단계 - NetBox 업그레이드
NetBox 업그레이드는 매우 쉽습니다. 이 단계에는 Git 리포지토리의 마스터 분기를 확인하고 최신 커밋을 가져온 다음 새 안정 버전을 확인하는 작업이 포함됩니다.
NetBox 디렉토리로 전환하십시오.
$ cd /opt/netbox
마스터 브랜치를 확인하십시오.
$ sudo git checkout master
저장소에서 최신 커밋을 가져옵니다.
$ sudo git pull origin master
새 버전을 확인하십시오. 3.4.2가 최신 버전이면 확인하실 수 있습니다.
$ sudo git checkout v3.4.2
업그레이드 스크립트를 실행합니다.
$ sudo ./upgrade.sh
업그레이드 프로세스의 경우 스크립트는 다음 기능을 수행합니다.
- Python 가상 환경을 파괴하고 재구축합니다.\n
- 필요한 모든 Python 패키지를 설치합니다(
requirements.txt에 나열됨).\n local_requirements.txt에서 추가 패키지를 설치합니다.\n- 릴리스에 포함된 모든 데이터베이스 마이그레이션을 적용합니다.\n
- 로컬에서 문서 작성(오프라인용)\n
- HTTP 서비스에서 제공할 모든 정적 파일 수집\n
- 데이터베이스에서 오래된 콘텐츠 유형을 삭제합니다.\n
- 만료된 모든 사용자 세션을 데이터베이스에서 삭제합니다.\n
Gunicorn 및 NetBox 서비스를 다시 시작합니다.
$ sudo systemctl restart netbox netbox-rq
결론
이것으로 NGinx와 함께 Ubuntu 22.04 서버에 역방향 프록시 서버로 NetBox 네트워크 문서 및 관리 도구를 설치하는 방법에 대한 자습서를 마칩니다. 질문이 있으시면 아래 의견에 게시하십시오.