Android의 NavigationView
이 자습서에서는 Android 애플리케이션에서 NavigationView에 대해 논의하고 구현합니다. 여기서는 오른쪽에서 왼쪽으로도 열리도록 스타일을 지정하는 방법을 배웁니다.
내비게이션 보기
사용자 지정 어댑터를 구현하여 RecyclerView에 Navigation Drawer를 이미 구현했습니다. NavigationView의 도입으로 필요한 것은 곧 보게 될 메뉴 리소스를 사용하여 항목을 확장하는 것입니다. NavigationView는 일반적으로 DrawerLayout 안에 배치됩니다.
NavigationView 시작하기
NavigationView 이해
NavigationView 클래스는 FrameLayout을 확장합니다. 태그 아래의 xml에서 다음과 같이 정의됩니다.
<android.support.design.widget.NavigationView/>
NavigationView는 기본적으로 두 가지 주요 구성 요소로 구성됩니다.
- HeaderView : 이 보기는 일반적으로 Navigation Drawer의 상단에 표시됩니다. 기본적으로 프로필 사진, 이름 이메일 주소 및 배경 표지 사진이 있습니다. 이 뷰는 잠시 후에 살펴볼 별도의 레이아웃 파일에 정의되어 있습니다. NavigationView에 레이아웃을 추가하기 위해 app:headerLayout 매개변수가 사용됩니다.
- Menu : HeaderView 아래에 표시되며 모든 탐색 항목을 목록 형태로 포함합니다. 이에 대한 레이아웃 파일은 menus 폴더에 정의되어 있습니다. NavigationView 에 레이아웃을 추가하려면 app:menus 매개변수가 사용됩니다.
NavigationView를 사용자 지정하는 데 사용되는 다른 중요한 XML 특성은 다음과 같습니다.
- app:itemTextColor : 텍스트 색상을 변경합니다
- app:itemIconTint : 아이콘 색상을 변경합니다
- app:itemBackground : 항목 배경색을 변경합니다.
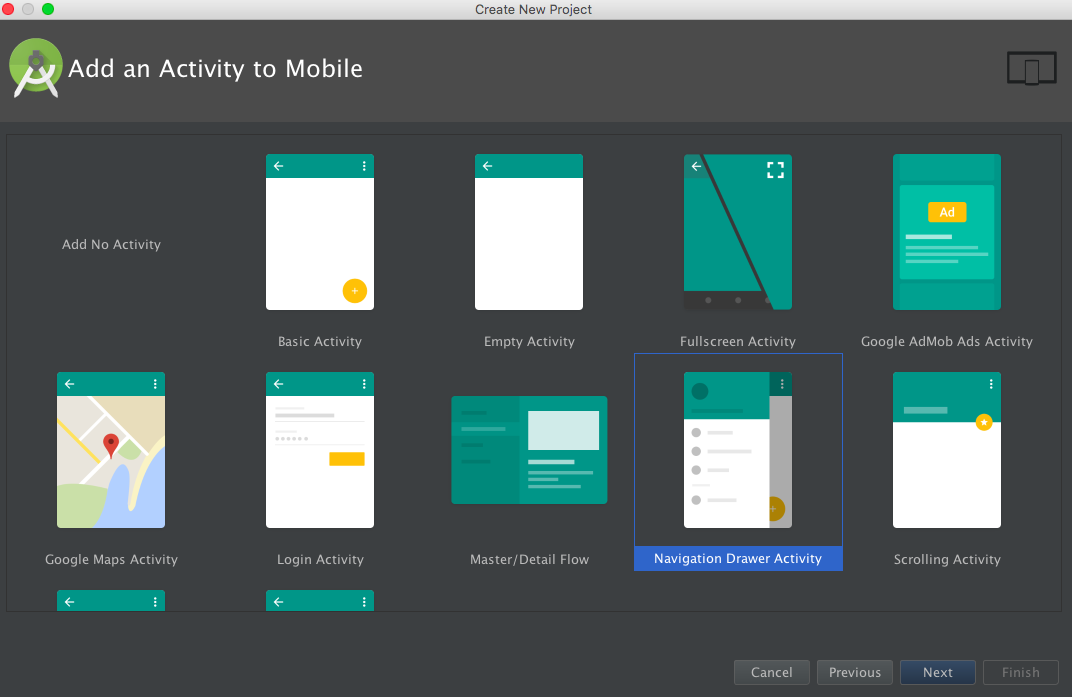
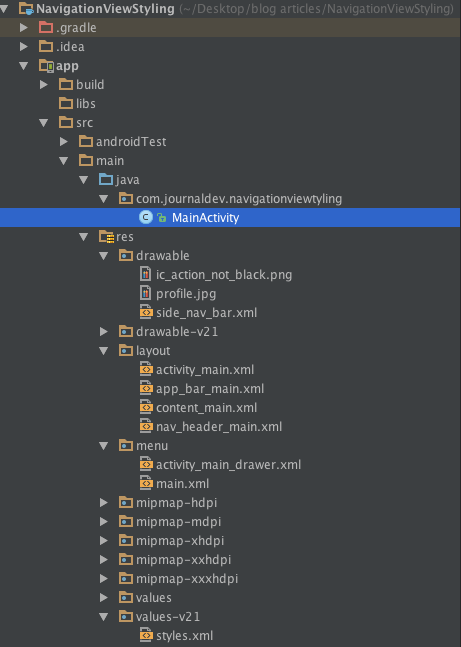
내장된 NavigationView 템플릿의 프로젝트 구조를 살펴보겠습니다. activity_main.xml은 MainActivity의 레이아웃입니다.
<?xml version="1.0" encoding="utf-8"?>
<android.support.v4.widget.DrawerLayout xmlns:android="https://schemas.android.com/apk/res/android"
    xmlns:app="https://schemas.android.com/apk/res-auto"
    xmlns:tools="https://schemas.android.com/tools"
    android:id="@+id/drawer_layout"
    android:layout_width="match_parent"
    android:layout_height="match_parent"
    android:fitsSystemWindows="true"
    tools:openDrawer="start">

    <include
        layout="@layout/app_bar_main"
        android:layout_width="match_parent"
        android:layout_height="match_parent" />

    <android.support.design.widget.NavigationView
        android:id="@+id/nav_view"
        android:layout_width="wrap_content"
        android:layout_height="match_parent"
        android:layout_gravity="start"
        android:fitsSystemWindows="true"
        app:headerLayout="@layout/nav_header_main"
        app:menu="@menu/activity_main_drawer" />

</android.support.v4.widget.DrawerLayout>
참고: 위의 DrawerLayout은 내비게이션 서랍 콘텐츠와 앱 콘텐츠를 포함하는 레이아웃입니다. app_bar_main.xml 레이아웃은 ToolBar, FloatingActionButton 및 content_main.xml 레이아웃(기본 'Hello 세계' TextView). 레이아웃은 아래에 나열되어 있습니다. app_bar_main.xml
<?xml version="1.0" encoding="utf-8"?>
<android.support.design.widget.CoordinatorLayout xmlns:android="https://schemas.android.com/apk/res/android"
    xmlns:app="https://schemas.android.com/apk/res-auto"
    xmlns:tools="https://schemas.android.com/tools"
    android:layout_width="match_parent"
    android:layout_height="match_parent"
    android:fitsSystemWindows="true"
    tools:context="com.journaldev.navigationviewstyling.MainActivity">

    <android.support.design.widget.AppBarLayout
        android:layout_width="match_parent"
        android:layout_height="wrap_content"
        android:theme="@style/AppTheme.AppBarOverlay">

        <android.support.v7.widget.Toolbar
            android:id="@+id/toolbar"
            android:layout_width="match_parent"
            android:layout_height="?attr/actionBarSize"
            android:background="?attr/colorPrimary"
            app:popupTheme="@style/AppTheme.PopupOverlay" />

    </android.support.design.widget.AppBarLayout>

    <include layout="@layout/content_main" />

    <android.support.design.widget.FloatingActionButton
        android:id="@+id/fab"
        android:layout_width="wrap_content"
        android:layout_height="wrap_content"
        android:layout_gravity="bottom|end"
        android:layout_margin="@dimen/fab_margin"
        android:src="@android:drawable/ic_dialog_email" />

</android.support.design.widget.CoordinatorLayout>
content_main.xml 레이아웃은 다음과 같습니다.
<?xml version="1.0" encoding="utf-8"?>
<RelativeLayout xmlns:android="https://schemas.android.com/apk/res/android"
    xmlns:app="https://schemas.android.com/apk/res-auto"
    xmlns:tools="https://schemas.android.com/tools"
    android:layout_width="match_parent"
    android:layout_height="match_parent"
    android:paddingBottom="@dimen/activity_vertical_margin"
    android:paddingLeft="@dimen/activity_horizontal_margin"
    android:paddingRight="@dimen/activity_horizontal_margin"
    android:paddingTop="@dimen/activity_vertical_margin"
    app:layout_behavior="@string/appbar_scrolling_view_behavior"
    tools:context="com.journaldev.navigationviewstyling.MainActivity"
    tools:showIn="@layout/app_bar_main">

    <TextView
        android:layout_width="wrap_content"
        android:layout_height="wrap_content"
        android:text="Hello World!" />
</RelativeLayout>
NavigationView의 기본 headerLayout 및 메뉴는 다음과 같습니다. nav_header_main.xml
<?xml version="1.0" encoding="utf-8"?>
<LinearLayout xmlns:android="https://schemas.android.com/apk/res/android"
    android:layout_width="match_parent"
    android:layout_height="@dimen/nav_header_height"
    android:background="@drawable/side_nav_bar"
    android:gravity="bottom"
    android:orientation="vertical"
    android:paddingBottom="@dimen/activity_vertical_margin"
    android:paddingLeft="@dimen/activity_horizontal_margin"
    android:paddingRight="@dimen/activity_horizontal_margin"
    android:paddingTop="@dimen/activity_vertical_margin"
    android:theme="@style/ThemeOverlay.AppCompat.Dark">

    <ImageView
        android:id="@+id/imageView"
        android:layout_width="wrap_content"
        android:layout_height="wrap_content"
        android:paddingTop="@dimen/nav_header_vertical_spacing"
        android:src="@android:drawable/sym_def_app_icon" />

    <TextView
        android:layout_width="match_parent"
        android:layout_height="wrap_content"
        android:paddingTop="@dimen/nav_header_vertical_spacing"
        android:text="Android Studio"
        android:textAppearance="@style/TextAppearance.AppCompat.Body1" />

    <TextView
        android:id="@+id/textView"
        android:layout_width="wrap_content"
        android:layout_height="wrap_content"
        android:text="android.studio@android.com" />

</LinearLayout>
activity_main_drawer.xml
<menu xmlns:android="https://schemas.android.com/apk/res/android">

    <group android:checkableBehavior="single">
        <item
            android:id="@+id/nav_camera"
            android:icon="@drawable/ic_menu_camera"
            android:title="Import" />
        <item
            android:id="@+id/nav_gallery"
            android:icon="@drawable/ic_menu_gallery"
            android:title="Gallery" />
        <item
            android:id="@+id/nav_slideshow"
            android:icon="@drawable/ic_menu_slideshow"
            android:title="Slideshow" />
        <item
            android:id="@+id/nav_manage"
            android:icon="@drawable/ic_menu_manage"
            android:title="Tools" />
    </group>

    <item android:title="Communicate">
        <menu>
            <item
                android:id="@+id/nav_share"
                android:icon="@drawable/ic_menu_share"
                android:title="Share" />
            <item
                android:id="@+id/nav_send"
                android:icon="@drawable/ic_menu_send"
                android:title="Send" />
        </menu>
    </item>

</menu>
android:checkableBehavior xml 속성은 전체 그룹에 대해 정의되며 아래 나열된 세 값 중 하나를 사용합니다.
- single : 그룹에서 한 항목만 체크 가능
- all : 모든 항목을 체크할 수 있음(체크박스)
- none : 체크할 수 있는 항목이 없습니다.
android:checkable 속성은 개별 항목의 선택 가능한 동작을 설정하는 데 사용됩니다. 부울 값을 허용합니다. 참고: 중첩된 메뉴 항목은 app:menus 레이아웃 내에서 가능합니다. MainActivity.java는 아래와 같습니다.
package com.journaldev.navigationviewstyling;

import android.os.Bundle;
import android.support.design.widget.FloatingActionButton;
import android.support.design.widget.Snackbar;
import android.view.View;
import android.support.design.widget.NavigationView;
import android.support.v4.view.GravityCompat;
import android.support.v4.widget.DrawerLayout;
import android.support.v7.app.ActionBarDrawerToggle;
import android.support.v7.app.AppCompatActivity;
import android.support.v7.widget.Toolbar;
import android.view.Menu;
import android.view.MenuItem;

public class MainActivity extends AppCompatActivity
        implements NavigationView.OnNavigationItemSelectedListener {

    @Override
    protected void onCreate(Bundle savedInstanceState) {
        super.onCreate(savedInstanceState);
        setContentView(R.layout.activity_main);
        Toolbar toolbar = (Toolbar) findViewById(R.id.toolbar);
        setSupportActionBar(toolbar);

        FloatingActionButton fab = (FloatingActionButton) findViewById(R.id.fab);
        fab.setOnClickListener(new View.OnClickListener() {
            @Override
            public void onClick(View view) {
                Snackbar.make(view, "Replace with your own action", Snackbar.LENGTH_LONG)
                        .setAction("Action", null).show();
            }
        });

        DrawerLayout drawer = (DrawerLayout) findViewById(R.id.drawer_layout);
        ActionBarDrawerToggle toggle = new ActionBarDrawerToggle(
                this, drawer, toolbar, R.string.navigation_drawer_open, R.string.navigation_drawer_close);
        //drawer.setDrawerListener(toggle);
        drawer.addDrawerListener(toggle);
        toggle.syncState();

        NavigationView navigationView = (NavigationView) findViewById(R.id.nav_view);
        navigationView.setNavigationItemSelectedListener(this);
    }

    @Override
    public void onBackPressed() {
        DrawerLayout drawer = (DrawerLayout) findViewById(R.id.drawer_layout);
        if (drawer.isDrawerOpen(GravityCompat.START)) {
            drawer.closeDrawer(GravityCompat.START);
        } else {
            super.onBackPressed();
        }
    }

    @Override
    public boolean onCreateOptionsMenu(Menu menu) {
        // Inflate the menu; this adds items to the action bar if it is present.
        getMenuInflater().inflate(R.menu.main, menu);
        return true;
    }

    @Override
    public boolean onOptionsItemSelected(MenuItem item) {
        // Handle action bar item clicks here. The action bar will
        // automatically handle clicks on the Home/Up button, so long
        // as you specify a parent activity in AndroidManifest.xml.
        int id = item.getItemId();

        //noinspection SimplifiableIfStatement
        if (id == R.id.action_settings) {
            return true;
        }

        return super.onOptionsItemSelected(item);
    }

    @SuppressWarnings("StatementWithEmptyBody")
    @Override
    public boolean onNavigationItemSelected(MenuItem item) {
        // Handle navigation view item clicks here.
        int id = item.getItemId();

        if (id == R.id.nav_camera) {
            // Handle the camera action
        } else if (id == R.id.nav_gallery) {

        } else if (id == R.id.nav_slideshow) {

        } else if (id == R.id.nav_manage) {

        } else if (id == R.id.nav_share) {

        } else if (id == R.id.nav_send) {

        }

        DrawerLayout drawer = (DrawerLayout) findViewById(R.id.drawer_layout);
        drawer.closeDrawer(GravityCompat.START);
        return true;
    }
}
위의 코드 조각에서 도출된 중요한 추론은 다음과 같습니다.
-
The MainActivity implements NavigationView.OnNavigationItemSelectedListener and overrides the method onNavigationItemSelected. We handle the menu item clicks here and close the Drawer towards the left. Let’s display a Toast message for each of the items as show below.
@Override public boolean onNavigationItemSelected(MenuItem item) { int id = item.getItemId(); if (id == R.id.nav_camera) { // Handle the camera action Toast.makeText(getApplicationContext(), "Camera is clicked", Toast.LENGTH_SHORT).show(); } else if (id == R.id.nav_gallery) { Toast.makeText(getApplicationContext(), "Gallery is clicked", Toast.LENGTH_SHORT).show(); } else if (id == R.id.nav_slideshow) { Toast.makeText(getApplicationContext(), "Slideshow is clicked", Toast.LENGTH_SHORT).show(); } else if (id == R.id.nav_manage) { Toast.makeText(getApplicationContext(), "Tools is clicked", Toast.LENGTH_SHORT).show(); } else if (id == R.id.nav_share) { Toast.makeText(getApplicationContext(), "Share is clicked", Toast.LENGTH_SHORT).show(); } else if (id == R.id.nav_send) { Toast.makeText(getApplicationContext(), "Send is clicked", Toast.LENGTH_SHORT).show(); } DrawerLayout drawer = (DrawerLayout) findViewById(R.id.drawer_layout); drawer.closeDrawer(GravityCompat.START); return true; } -
The ActionBarDrawerToggle is initialised as:
ActionBarDrawerToggle toggle = new ActionBarDrawerToggle(
                this, drawer, toolbar, R.string.navigation_drawer_open, R.string.navigation_drawer_close);
The ActionBarDrawerToggle is used with a DrawerLayout to implement the recommended functionality of Navigation Drawers. It has the following usages:
- It acts as a listener, for opening and closing of drawers.
- It provides the hamburger icons in the ToolBar/ActionBar.
- It’s allows for the animation between the hamburger icon and the arrow to exist.
Note: android.support.v4.app.ActionBarDrawerToggle is deprecated. Always use android.support.v7.app.ActionBarDrawerToggle as a replacement.
-
To add a listener on the DrawerLayout the following method is used.
drawer.addDrawerListener(toggle);This listener is used to keep notified of drawer events. Note: drawer.setDrawerListener(toggle) is now deprecated. -
toggle.syncState() : will synchronise the icon’s state and display the hamburger icon or back arrow depending on whether the drawer is closed or open. Omitting this line of code won’t change the back arrow to the hamburger icon when the drawer is closed.
-
drawer.closeDrawer(GravityCompat.START) : is used to close the drawer by setting the gravity to START(left by default)

<?xml version="1.0" encoding="utf-8"?>
<LinearLayout xmlns:android="https://schemas.android.com/apk/res/android"
xmlns:app="https://schemas.android.com/apk/res-auto"
android:orientation="vertical"
android:layout_width="match_parent"
android:layout_height="match_parent">

<!-- The toolbar -->
<android.support.v7.widget.Toolbar
    android:id="@+id/toolbar"
    android:layout_height="wrap_content"
    android:layout_width="match_parent"
    android:fitsSystemWindows="true"
    android:minHeight="?attr/actionBarSize"
    android:theme="@style/AppTheme.AppBarOverlay"
    android:background="?attr/colorPrimary" />

<android.support.v4.widget.DrawerLayout
    xmlns:android="https://schemas.android.com/apk/res/android"
    android:id="@+id/drawer_layout"
    android:layout_width="match_parent"
    android:fitsSystemWindows="true"
    android:layout_height="match_parent">

    <include
        layout="@layout/app_bar_main"
        android:layout_width="match_parent"
        android:layout_height="match_parent" />

    <android.support.design.widget.NavigationView
        android:id="@+id/nav_view"
        android:layout_width="wrap_content"
        android:layout_height="match_parent"
        android:layout_gravity="start"
        android:fitsSystemWindows="true"
        app:headerLayout="@layout/nav_header_main"
        app:menu="@menu/activity_main_drawer" />


</android.support.v4.widget.DrawerLayout>

</LinearLayout>

<?xml version="1.0" encoding="utf-8"?>
<RelativeLayout xmlns:android="https://schemas.android.com/apk/res/android"
    xmlns:tools="https://schemas.android.com/tools"
    android:layout_width="match_parent"
    android:layout_height="match_parent"
    tools:context="com.journaldev.navigationviewstyling.MainActivity">

    <include layout="@layout/content_main" />

    <android.support.design.widget.FloatingActionButton
        android:id="@+id/fab"
        android:layout_width="wrap_content"
        android:layout_height="wrap_content"
        android:layout_gravity="bottom|end"
        android:src="@android:drawable/ic_dialog_email"
        android:layout_alignParentBottom="true"
        android:layout_margin="@dimen/activity_horizontal_margin"
        android:layout_alignParentRight="true"
        android:layout_alignParentEnd="true" />

</RelativeLayout>

<item name="android:statusBarColor">@android:color/transparent</item>
오른쪽에서 왼쪽으로 열리도록 NavigationView를 맞춤설정해 보겠습니다.
프로젝트 구조
Android NavigationView 예제 코드
이제 activity_main.xml 레이아웃이 다음과 같이 정의됩니다.
<?xml version="1.0" encoding="utf-8"?>
<LinearLayout xmlns:android="https://schemas.android.com/apk/res/android"
    xmlns:app="https://schemas.android.com/apk/res-auto"
    xmlns:tools="https://schemas.android.com/tools"
    android:orientation="vertical"
    android:layout_width="match_parent"
    android:layout_height="match_parent">

    <!-- The toolbar -->
    <RelativeLayout
        android:layout_width="match_parent"
        android:fitsSystemWindows="true"
        android:layout_height="wrap_content">

        <android.support.v7.widget.Toolbar
            android:id="@+id/toolbar"
            android:layout_width="match_parent"
            android:layout_height="wrap_content"
            android:minHeight="?attr/actionBarSize"
            android:background="?attr/colorPrimary"
            android:fitsSystemWindows="true"
            android:theme="@style/AppTheme.AppBarOverlay" />

        <FrameLayout
            android:id="@+id/drawer_button"
            android:layout_width="50dp"
            android:layout_height="?attr/actionBarSize"
            android:fitsSystemWindows="true"
            android:layout_alignParentRight="true"
            android:clickable="true">

            <ImageView
                android:layout_width="wrap_content"
                android:layout_height="wrap_content"
                android:layout_gravity="center_horizontal|center_vertical"
                android:src="@drawable/ic_action_not_black" />
        </FrameLayout>


    </RelativeLayout>

    <android.support.v4.widget.DrawerLayout
        xmlns:android="https://schemas.android.com/apk/res/android"
        android:id="@+id/drawer_layout"
        android:layout_width="match_parent"
        android:fitsSystemWindows="true"
        android:layout_height="match_parent"
        tools:openDrawer="end">

        <include
            layout="@layout/app_bar_main"
            android:layout_width="match_parent"
            android:layout_height="match_parent" />

        <android.support.design.widget.NavigationView
            android:id="@+id/nav_view"
            android:layout_width="wrap_content"
            android:layout_height="match_parent"
            android:layout_gravity="end"
            android:fitsSystemWindows="true"
            app:itemTextColor="#1d3f4c"
            app:itemIconTint="#cd4312"
            app:headerLayout="@layout/nav_header_main"
            app:menu="@menu/activity_main_drawer" />


    </android.support.v4.widget.DrawerLayout>

</LinearLayout>
RelativeLayout 내부에 FrameLayout이 있는 ToolBar를 배치했습니다. android:fitSystemWindows는 세 항목 모두에서 true로 설정되어야 합니다. DrawerLayout에는 서랍의 기본 면을 오른쪽으로 변경하는 tools:openDrawer=\end\ 및 android:layout_gravity=\end\가 포함되어 있습니다. 이상적으로 원형 헤더 이미지는 NavigationView 내에서 아름답게 보입니다. 종속성 de.hdodenhof.circleimageview.CircleImageView를 컴파일하고 아래와 같이 nav_header_main.xml 파일에서 사용합니다. nav_header_main.xml
<?xml version="1.0" encoding="utf-8"?>
<LinearLayout xmlns:android="https://schemas.android.com/apk/res/android"
    android:layout_width="match_parent"
    android:layout_height="@dimen/nav_header_height"
    android:background="@drawable/side_nav_bar"
    android:gravity="bottom"
    android:orientation="vertical"
    android:paddingBottom="@dimen/activity_vertical_margin"
    android:paddingLeft="@dimen/activity_horizontal_margin"
    android:paddingRight="@dimen/activity_horizontal_margin"
    android:paddingTop="@dimen/activity_vertical_margin"
    android:theme="@style/ThemeOverlay.AppCompat.Dark">

    <de.hdodenhof.circleimageview.CircleImageView
        android:id="@+id/imageView"
        android:layout_width="75dp"
        android:layout_height="75dp"
        android:paddingTop="@dimen/nav_header_vertical_spacing"
        android:src="@drawable/profile" />

    <TextView
        android:layout_width="match_parent"
        android:layout_height="wrap_content"
        android:paddingTop="@dimen/nav_header_vertical_spacing"
        android:text="Anupam Chugh"
        android:textAppearance="@style/TextAppearance.AppCompat.Body1" />

    <TextView
        android:id="@+id/textView"
        android:layout_width="wrap_content"
        android:layout_height="wrap_content"
        android:text="www.JournalDev.com" />

</LinearLayout>
다른 xml 레이아웃은 위에서 설명한 것과 동일합니다. MainActivity.java는 다음과 같습니다.
package com.journaldev.navigationviewtyling;

import android.os.Bundle;
import android.support.design.widget.FloatingActionButton;
import android.support.design.widget.Snackbar;
import android.view.View;
import android.support.design.widget.NavigationView;
import android.support.v4.view.GravityCompat;
import android.support.v4.widget.DrawerLayout;
import android.support.v7.app.ActionBarDrawerToggle;
import android.support.v7.app.AppCompatActivity;
import android.support.v7.widget.Toolbar;
import android.view.MenuItem;
import android.widget.Toast;

public class MainActivity extends AppCompatActivity
        implements NavigationView.OnNavigationItemSelectedListener {

    DrawerLayout drawer;

    @Override
    protected void onCreate(Bundle savedInstanceState) {
        super.onCreate(savedInstanceState);
        setContentView(R.layout.activity_main);
        Toolbar toolbar = (Toolbar) findViewById(R.id.toolbar);
        setSupportActionBar(toolbar);

        drawer = (DrawerLayout) findViewById(R.id.drawer_layout);

        findViewById(R.id.drawer_button).setOnClickListener(new View.OnClickListener() {
            @Override
            public void onClick(View v) {
                // open right drawer

                if (drawer.isDrawerOpen(GravityCompat.END)) {
                    drawer.closeDrawer(GravityCompat.END);
                }
                else
                drawer.openDrawer(GravityCompat.END);
            }
        });

        FloatingActionButton fab = (FloatingActionButton) findViewById(R.id.fab);
        fab.setOnClickListener(new View.OnClickListener() {
            @Override
            public void onClick(View view) {
                Snackbar.make(view, "Replace with your own action", Snackbar.LENGTH_LONG)
                        .setAction("Action", null).show();
            }
        });

        ActionBarDrawerToggle toggle = new ActionBarDrawerToggle(
                this, drawer, toolbar, R.string.navigation_drawer_open, R.string.navigation_drawer_close);
        toggle.setDrawerIndicatorEnabled(false);
        drawer.addDrawerListener(toggle);

        toggle.syncState();


        NavigationView navigationView = (NavigationView) findViewById(R.id.nav_view);
        navigationView.setNavigationItemSelectedListener(this);
    }

    @Override
    public void onBackPressed() {

        if (drawer.isDrawerOpen(GravityCompat.END)) {
            drawer.closeDrawer(GravityCompat.END);
        } else {
            super.onBackPressed();
        }
    }


    @SuppressWarnings("StatementWithEmptyBody")
    @Override
    public boolean onNavigationItemSelected(MenuItem item) {
        // Handle navigation view item clicks here.
        int id = item.getItemId();

        if (id == R.id.nav_camera) {
            // Handle the camera action
            Toast.makeText(getApplicationContext(), "Camera is clicked", Toast.LENGTH_SHORT).show();

        } else if (id == R.id.nav_gallery) {
            Toast.makeText(getApplicationContext(), "Gallery is clicked", Toast.LENGTH_SHORT).show();

        } else if (id == R.id.nav_slideshow) {
            Toast.makeText(getApplicationContext(), "Slideshow is clicked", Toast.LENGTH_SHORT).show();

        } else if (id == R.id.nav_manage) {
            Toast.makeText(getApplicationContext(), "Tools is clicked", Toast.LENGTH_SHORT).show();

        } else if (id == R.id.nav_share) {
            Toast.makeText(getApplicationContext(), "Share is clicked", Toast.LENGTH_SHORT).show();

        } else if (id == R.id.nav_send) {
            Toast.makeText(getApplicationContext(), "Send is clicked", Toast.LENGTH_SHORT).show();

        }

        DrawerLayout drawer = (DrawerLayout) findViewById(R.id.drawer_layout);
        drawer.closeDrawer(GravityCompat.END);
        return true;
    }
}
위의 코드에서 도출된 중요한 추론은 다음과 같습니다.
toggle.setDrawerIndicatorEnabled(false);: 이 줄은 왼쪽에 표시되었던 기본 햄버거 아이콘을 숨기는 데 사용됩니다.- 모든 GravityCompat 상수가 이제 START 대신 END로 변경되었습니다.

Android NavigationView 예제 프로젝트 다운로드