Android 플로팅 작업 버튼 예제 자습서
오늘은 안드로이드 플로팅 액션 버튼에 대해 알아보겠습니다. Material Design Guidelines 및 Toast에 포함된 새로운 구성요소인 FloatingActionButton에 대해 논의할 것입니다.
Android 플로팅 작업 버튼
Android Floating Action Button은 화면에서 가장 중요한 기능을 강조하기 위해 사용됩니다. 사용자의 관심을 끌 수 있는 멋지고 스타일리시한 방법입니다.
Android 플로팅 작업 버튼 개요
프로젝트에서 머티리얼 디자인 위젯을 사용하려면 아래와 같이 build.gradle 파일에서 다음 종속성을 컴파일해야 합니다.
compile 'com.android.support:design:23.1.1'
FloatingActionButton 위젯은 다음과 같이 xml 레이아웃에 정의됩니다.
<android.support.design.widget.FloatingActionButton
      android:id="@+id/fab"
      android:layout_width="wrap_content"
      android:layout_height="wrap_content"
      android:src="@android:drawable/ic_dialog_email"
      android:layout_gravity="bottom|end"
      app:elevation="6dp"
      app:pressedTranslationZ="12dp"/>
위의 XML 레이아웃에서 정의된 몇 가지 관찰 사항은 다음과 같습니다.
- FloatingActionButton은 ImageView 클래스를 확장합니다. 이것은 정의된
android:src속성에서 분명합니다. - 위의 xml 레이아웃에서 고도 속성은 버튼 위에 그림자를 드리우는 데 사용되며 pressedTranslationZ는 누를 때 그림자가 커지도록 합니다.
FloatingActionButton은 CoordinatorLayout 내에 배치됩니다. CoordinatorLayout은 그 안에 포함된 보기 간의 상호 작용을 용이하게 하는 데 도움이 되며 나중에 스크롤 변경에 따라 단추를 애니메이션하는 방법을 설명하는 데 유용합니다. SnackBar는 Toast에 비해 더욱 향상된 위젯입니다. SnackBar는 다음과 같이 호출됩니다.
Snackbar.make(view, "Replace with your own action", Snackbar.LENGTH_LONG)
                        .setAction("Action", null).show();
다른 자습서에서 SnackBar에 대해 자세히 설명했습니다. 중요 참고 사항: 이 Android 자습서를 잘 따라왔다면 새로운 빌드 도구가 23.1.1로 업데이트되면서 비어 있는 새 프로젝트의 프로젝트 구조가 변경되고 위에서 언급한 위젯이 기본적으로 새로운 Android 스튜디오 프로젝트. 위에서 언급한 위젯을 구현하는 대신 새 프로젝트 구조를 간단히 살펴보겠습니다.
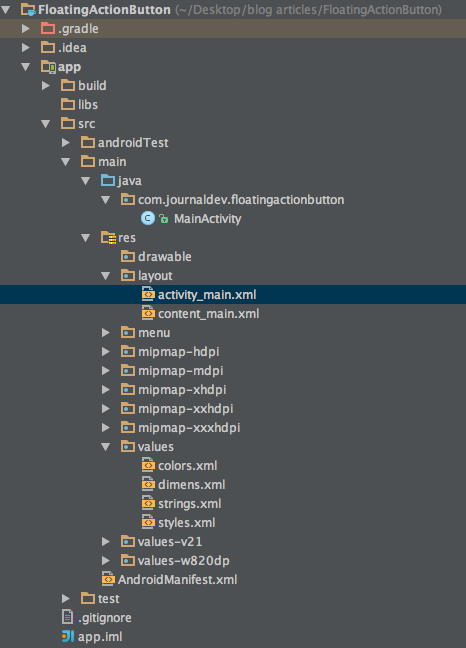
Android 플로팅 작업 버튼 예제 프로젝트 구조
Android 플로팅 작업 버튼 예제
새 activity_main.xml은 다음과 같습니다.
<?xml version="1.0" encoding="utf-8"?>
<android.support.design.widget.CoordinatorLayout xmlns:android="https://schemas.android.com/apk/res/android"
    xmlns:app="https://schemas.android.com/apk/res-auto"
    xmlns:tools="https://schemas.android.com/tools"
    android:layout_width="match_parent"
    android:layout_height="match_parent"
    android:fitsSystemWindows="true"
    tools:context="com.journaldev.floatingactionbutton.MainActivity">

    <android.support.design.widget.AppBarLayout
        android:layout_width="match_parent"
        android:layout_height="wrap_content"
        android:theme="@style/AppTheme.AppBarOverlay">

        <android.support.v7.widget.Toolbar
            android:id="@+id/toolbar"
            android:layout_width="match_parent"
            android:layout_height="?attr/actionBarSize"
            android:background="?attr/colorPrimary"
            app:popupTheme="@style/AppTheme.PopupOverlay" />

    </android.support.design.widget.AppBarLayout>

    <include layout="@layout/content_main" />

    <android.support.design.widget.FloatingActionButton
        android:id="@+id/fab"
        android:layout_width="wrap_content"
        android:layout_height="wrap_content"
        android:layout_gravity="bottom|end"
        android:layout_margin="@dimen/fab_margin"
        android:src="@android:drawable/ic_dialog_email" />

</android.support.design.widget.CoordinatorLayout>
ActionBar 대신 도구 모음이 기본적으로 추가됩니다. CoordinatorLayout의 직계 자식인 AppBarLayout 내부에 추가됩니다. AppBarLayout은 축소, 가변 공간 및 빠른 반환과 같은 다양한 스크롤 동작을 달성하는 데 사용됩니다. MainActivity.java는 아래와 같이 정의됩니다.
package com.journaldev.floatingactionbutton;

import android.os.Bundle;
import android.support.design.widget.FloatingActionButton;
import android.support.design.widget.Snackbar;
import android.support.v7.app.AppCompatActivity;
import android.support.v7.widget.Toolbar;
import android.view.View;
import android.view.Menu;
import android.view.MenuItem;

public class MainActivity extends AppCompatActivity {

    @Override
    protected void onCreate(Bundle savedInstanceState) {
        super.onCreate(savedInstanceState);
        setContentView(R.layout.activity_main);
        Toolbar toolbar = (Toolbar) findViewById(R.id.toolbar);
        setSupportActionBar(toolbar);

        FloatingActionButton fab = (FloatingActionButton) findViewById(R.id.fab);
        fab.setOnClickListener(new View.OnClickListener() {
            @Override
            public void onClick(View view) {
                Snackbar.make(view, "Replace with your own action", Snackbar.LENGTH_LONG)
                        .setAction("Action", null).show();
            }
        });
    }

    @Override
    public boolean onCreateOptionsMenu(Menu menu) {
        // Inflate the menu; this adds items to the action bar if it is present.
        getMenuInflater().inflate(R.menu.menu_main, menu);
        return true;
    }

    @Override
    public boolean onOptionsItemSelected(MenuItem item) {
        // Handle action bar item clicks here. The action bar will
        // automatically handle clicks on the Home/Up button, so long
        // as you specify a parent activity in AndroidManifest.xml.
        int id = item.getItemId();

        //noinspection SimplifiableIfStatement
        if (id == R.id.action_settings) {
            return true;
        }

        return super.onOptionsItemSelected(item);
    }
}
