Android ViewPager 예제 자습서
Android의 ViewPager를 사용하면 데이터 페이지를 좌우로 넘길 수 있습니다. Android ViewPager 애플리케이션에서 서로 다른 이미지와 텍스트가 있는 세 개의 보기를 통해 스와이프하는 ViewPager를 구현합니다.
Android ViewPager
Android ViewPager 위젯은 지원 라이브러리에서 찾을 수 있으며 사용자가 왼쪽 또는 오른쪽으로 스와이프하여 완전히 새로운 화면을 볼 수 있습니다. 오늘 우리는 Views와 PagerAdapter를 사용하여 ViewPager를 구현하고 있습니다. ListView를 사용하여 동일한 것을 구현할 수 있지만.
Android ViewPager 예
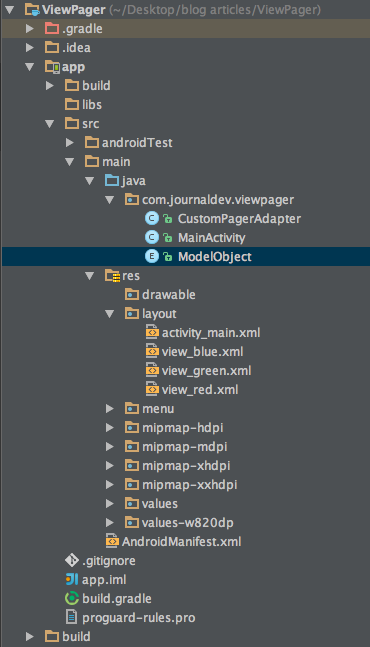
Android ViewPager 예제 코드
activity_main.xml은 아래와 같이 ViewPager만으로 구성됩니다. activity_main.xml
<RelativeLayout xmlns:android="https://schemas.android.com/apk/res/android"
    xmlns:tools="https://schemas.android.com/tools"
    android:layout_width="match_parent"
    android:layout_height="match_parent"
    tools:context=".MainActivity">

    <android.support.v4.view.ViewPager
        android:id="@+id/viewpager"
        android:layout_width="match_parent"
        android:layout_height="match_parent"/>

</RelativeLayout>
MainActivity.java는 아래와 같습니다. MainActivity.java
package com.journaldev.viewpager;

import android.support.v4.view.ViewPager;
import android.support.v7.app.AppCompatActivity;
import android.os.Bundle;
import android.view.Menu;
import android.view.MenuItem;

public class MainActivity extends AppCompatActivity {

    @Override
    protected void onCreate(Bundle savedInstanceState) {
        super.onCreate(savedInstanceState);
        setContentView(R.layout.activity_main);

        ViewPager viewPager = (ViewPager) findViewById(R.id.viewpager);
        viewPager.setAdapter(new CustomPagerAdapter(this));
    }
}
위 코드에서 MainActivity의 역할은 ViewPager를 참조하고 PagerAdapter를 확장하는 CustomPagerAdapter를 설정하는 것입니다. CustomPagerAdapter 클래스에 대해 논의하기 전에 ModelObject 클래스를 살펴보겠습니다. ModelObject.java
package com.journaldev.viewpager;

public enum ModelObject {

    RED(R.string.red, R.layout.view_red),
    BLUE(R.string.blue, R.layout.view_blue),
    GREEN(R.string.green, R.layout.view_green);

    private int mTitleResId;
    private int mLayoutResId;

    ModelObject(int titleResId, int layoutResId) {
        mTitleResId = titleResId;
        mLayoutResId = layoutResId;
    }

    public int getTitleResId() {
        return mTitleResId;
    }

    public int getLayoutResId() {
        return mLayoutResId;
    }

}
위 열거형은 ViewPagers의 모든 페이지를 나열합니다. 각각의 레이아웃이 있는 세 페이지가 있습니다. 단일 페이지의 레이아웃은 다음과 같습니다. view_blue.xml
<?xml version="1.0" encoding="utf-8"?>
<RelativeLayout xmlns:android="https://schemas.android.com/apk/res/android"
    android:orientation="vertical" android:layout_width="match_parent"
    android:background="@android:color/holo_blue_dark"
    android:layout_height="match_parent">

    <TextView
        android:layout_width="wrap_content"
        android:layout_height="wrap_content"
        android:text="Second View"
        android:layout_gravity="center_horizontal"
        android:textSize="28sp"
        android:textColor="@android:color/black"
        android:textStyle="bold"
        android:layout_centerVertical="true"
        android:layout_centerHorizontal="true"
        android:id="@+id/textView" />

    <TextView
        android:layout_width="wrap_content"
        android:layout_height="wrap_content"
        android:text="Swipe left to\nFirst View"
        android:layout_gravity="center_horizontal"
        android:textSize="20sp"
        android:textColor="@android:color/black"
        android:textStyle="bold"
        android:minLines="2"
        android:id="@+id/textView2"
        android:padding="@dimen/activity_horizontal_margin"
        android:layout_alignParentBottom="true"
        android:layout_alignParentLeft="true"
        android:layout_alignParentStart="true" />

    <TextView
        android:layout_width="wrap_content"
        android:layout_height="wrap_content"
        android:text="Swipe right to\nThird View"
        android:layout_gravity="center_horizontal"
        android:textSize="20sp"
        android:textColor="@android:color/black"
        android:textStyle="bold"
        android:padding="@dimen/activity_horizontal_margin"
        android:minLines="2"
        android:id="@+id/textView3"
        android:layout_alignTop="@+id/textView2"
        android:layout_alignParentRight="true"
        android:layout_alignParentEnd="true" />

</RelativeLayout>
나머지 두 페이지는 유사한 레이아웃을 가지며 이 프로젝트의 소스 코드에 제공됩니다. CustomPagerAdapter.java
package com.journaldev.viewpager;

import android.content.Context;
import android.support.v4.view.PagerAdapter;
import android.view.LayoutInflater;
import android.view.View;
import android.view.ViewGroup;

public class CustomPagerAdapter extends PagerAdapter {

    private Context mContext;

    public CustomPagerAdapter(Context context) {
        mContext = context;
    }

    @Override
    public Object instantiateItem(ViewGroup collection, int position) {
        ModelObject modelObject = ModelObject.values()[position];
        LayoutInflater inflater = LayoutInflater.from(mContext);
        ViewGroup layout = (ViewGroup) inflater.inflate(modelObject.getLayoutResId(), collection, false);
        collection.addView(layout);
        return layout;
    }

    @Override
    public void destroyItem(ViewGroup collection, int position, Object view) {
        collection.removeView((View) view);
    }

    @Override
    public int getCount() {
        return ModelObject.values().length;
    }

    @Override
    public boolean isViewFromObject(View view, Object object) {
        return view == object;
    }

    @Override
    public CharSequence getPageTitle(int position) {
        ModelObject customPagerEnum = ModelObject.values()[position];
        return mContext.getString(customPagerEnum.getTitleResId());
    }

}
- CustomPagerAdapter(Context context) : 생성자에는 Context 참조가 필요합니다. 컨텍스트는 나중에 enum 클래스에서 개별 페이지 레이아웃에 액세스하는 데 사용되므로 클래스의 멤버 변수로 저장됩니다.
- instantiateItem : 이 경우 열거형을 사용하고 특정 열거형 값의 관련 레이아웃을 확장합니다. 그런 다음 새로 확장된 레이아웃을 PagerAdapter가 유지 관리하는 ViewGroup(뷰 모음)에 추가한 다음 해당 레이아웃을 반환합니다. 이 메서드에서 반환되는 객체는 나중에
isViewFromObject메서드의 두 번째 매개변수로도 사용됩니다. - destroyItem : 이 메서드는 PagerAdapter에 의해 유지되는 ViewGroup에서 특정 뷰를 제거합니다.
- getCount : 단순히 ViewPager에 의해 유지될 뷰의 수를 반환합니다. 이 예에서 개수는 모델 개체의 열거형 값 수입니다.
- isViewFromObject : 이 메소드는 특정 객체가 주어진 위치에 속하는지 여부를 확인하므로 간단합니다. 앞서 언급했듯이 두 번째 매개변수는 Object 유형이며
instantiateItem메서드의 반환 값과 동일 - getPageTitle: 지정된 위치에서 PagerAdapter에 제목을 제공해야 합니다. 이것은 일반적으로 활동의 제목으로 ActionBar에 나타나거나 때로는 탭이 각 탭에 레이블을 지정하기 위해 이 메서드에 연결됩니다. 이 경우 라벨 지정용으로만 보관했습니다.
Android ViewPager 예제 프로젝트 다운로드