Ubuntu 18.04 LTS에 웹 기반 Guacamole 원격 데스크톱 클라이언트를 설치하는 방법
이 튜토리얼은 다음 OS 버전에 대해 존재합니다.
- Ubuntu 20.04(Focal Fossa)
- Ubuntu 18.04(Bionic Beaver)
이 페이지에서
- 전제 조건
- 시작하기\n
- 필수 종속성 설치\n
- Tomcat 서버 설치
- Guacamole 서버 설치
- Guacamole 클라이언트 설치
- Guacomole 구성
- Guacamole 웹 인터페이스 액세스
- Nginx를 Guacamole용 리버스 프록시로 구성\n
- 결론
시스템 관리자이고 Windows 및 Linux 시스템 관리를 담당하는 경우 이를 관리하기 위해 종종 원격 데스크톱 클라이언트 소프트웨어가 필요할 수 있습니다. Apache Guacamole은 웹 브라우저를 통해 데스크톱 시스템에 액세스할 수 있는 무료 오픈 소스 웹 기반 원격 데스크톱 애플리케이션입니다. VNC, RDP 및 SSH와 같은 표준 프로토콜을 지원하는 클라이언트리스 HTML5 웹 애플리케이션입니다. 서버에 클라이언트 소프트웨어나 플러그인을 설치할 필요가 없습니다. Guacamole을 사용하면 동일한 브라우저 창에서 여러 원격 데스크톱 시스템 간에 쉽게 전환할 수 있습니다.
이 자습서에서는 Ubuntu 18.04 LTS 서버에 Apache Guacamole 원격 데스크톱 게이트웨이를 설치하는 방법을 보여줍니다.
전제 조건
- Ubuntu 18.04를 실행하는 서버.\n
- 서버에 루트 비밀번호가 설정되어 있습니다.\n
시작하기
시작하기 전에 시스템 패키지를 최신 버전으로 업데이트하는 것이 좋습니다. 다음 명령을 사용하여 업데이트할 수 있습니다.
apt-get update -y
apt-get upgrade -y
모든 패키지가 업데이트되면 시스템을 다시 시작하여 변경 사항을 적용하십시오.
필수 종속성 설치
시작하기 전에 소스에서 Guacamole을 컴파일하려면 시스템에 일부 종속 항목을 설치해야 합니다. 다음 명령을 사용하여 모두 설치할 수 있습니다.
apt-get install gcc-6 g++-6 libossp-uuid-dev libavcodec-dev libpango1.0-dev libssh2-1-dev libcairo2-dev libjpeg-turbo8-dev libpng-dev libavutil-dev libswscale-dev libfreerdp-dev libvncserver-dev libssl-dev libvorbis-dev libwebp-dev -y
모든 패키지가 설치되면 다음 단계로 진행할 수 있습니다.
톰캣 서버 설치
다음으로 웹 브라우저를 통해 과카몰리 서버에 연결하는 사용자에게 과카몰리 클라이언트 콘텐츠를 제공하려면 서버에 Tomcat을 설치해야 합니다. 다음 명령을 사용하여 설치할 수 있습니다.
apt-get install tomcat8 tomcat8-admin tomcat8-common tomcat8-user -y
Tomcat이 설치되면 다음 단계로 진행할 수 있습니다.
아보카도 서버 설치
Guacamole은 guacd 프록시 및 관련 라이브러리를 제공하는 guacamole-server와 Tomcat 서버에서 제공할 클라이언트를 제공하는 guacamole-client의 두 구성 요소로 구분됩니다. 기본적으로 Guacamole Server는 Ubuntu 18.04 기본 리포지토리에서 사용할 수 없습니다. 따라서 소스에서 빌드해야 합니다.
먼저 다음 명령을 사용하여 최신 버전의 Guacamole 소스를 다운로드합니다.
wget http://apachemirror.wuchna.com/guacamole/1.1.0/source/guacamole-server-1.1.0.tar.gz
다운로드가 완료되면 다음 명령을 사용하여 다운로드한 파일의 압축을 풉니다.
tar -xvzf guacamole-server-1.1.0.tar.gz
그런 다음 디렉터리를 추출된 디렉터리로 변경하고 다음 명령으로 구성합니다.
cd guacamole-server-1.1.0
./configure --with-init-dir=/etc/init.d
구성이 성공하면 다음과 같은 결과가 표시됩니다.
   Library status:

     freerdp2 ............ no
     pango ............... yes
     libavcodec .......... yes
     libavutil ........... yes
     libssh2 ............. yes
     libssl .............. yes
     libswscale .......... yes
     libtelnet ........... no
     libVNCServer ........ yes
     libvorbis ........... yes
     libpulse ............ no
     libwebsockets ....... no
     libwebp ............. yes
     wsock32 ............. no

   Protocol support:

      Kubernetes .... no
      RDP ........... no
      SSH ........... yes
      Telnet ........ no
      VNC ........... yes

   Services / tools:

      guacd ...... yes
      guacenc .... yes
      guaclog .... yes

   FreeRDP plugins: no
   Init scripts: /etc/init.d
   Systemd units: no

Type "make" to compile guacamole-server.
다음으로 다음 명령을 실행하여 guacamole-server를 컴파일합니다.
make
컴파일이 성공적으로 완료되면 다음 명령으로 설치할 수 있습니다.
make install
설치가 완료되면 다음 명령을 실행하여 설치된 라이브러리의 시스템 캐시를 업데이트하십시오.
ldconfig
그런 다음 부팅 시 Guacamole 서비스가 시작되도록 활성화하고 다음 명령으로 시작합니다.
systemctl enable guacd
systemctl start guacd
다음 명령을 사용하여 Guacamole 서비스의 상태를 확인할 수도 있습니다.
systemctl status guacd
다음 출력이 표시되어야 합니다.
? guacd.service - LSB: Guacamole proxy daemon
   Loaded: loaded (/etc/init.d/guacd; generated)
   Active: active (running) since Sat 2020-04-11 14:48:03 UTC; 7s ago
     Docs: man:systemd-sysv-generator(8)
  Process: 28833 ExecStart=/etc/init.d/guacd start (code=exited, status=0/SUCCESS)
    Tasks: 1 (limit: 2359)
   CGroup: /system.slice/guacd.service
           ??28847 /usr/local/sbin/guacd -p /var/run/guacd.pid

Apr 11 14:48:03 ubuntu1804 systemd[1]: Starting LSB: Guacamole proxy daemon...
Apr 11 14:48:03 ubuntu1804 guacd[28834]: Guacamole proxy daemon (guacd) version 1.1.0 started
Apr 11 14:48:03 ubuntu1804 guacd[28833]: Starting guacd: guacd[28834]: INFO:        Guacamole proxy daemon (guacd) version 1.1.0 started
Apr 11 14:48:03 ubuntu1804 guacd[28833]: SUCCESS
Apr 11 14:48:03 ubuntu1804 systemd[1]: Started LSB: Guacamole proxy daemon.
Apr 11 14:48:03 ubuntu1804 guacd[28847]: Listening on host 127.0.0.1, port 4822
Guacamole 클라이언트 설치
다음으로 서버에 Guacamole 클라이언트를 설치해야 합니다. Guacamole 클라이언트는 Java로 작성되었으며 크로스 플랫폼입니다. 이것은 당신에게 제시될 최종 HTML5 애플리케이션을 구성할 것입니다.
먼저 다음 명령을 사용하여 Guacamole 바이너리 파일을 다운로드합니다.
wget https://mirrors.estointernet.in/apache/guacamole/1.1.0/binary/guacamole-1.1.0.war
다운로드가 완료되면 /etc/guacamole 디렉토리에 복사합니다.
mkdir /etc/guacamole
mv guacamole-1.1.0.war /etc/guacamole/guacamole.war
다음으로 다음 명령을 사용하여 과카몰리 클라이언트의 Tomcat webapps 디렉터리에 대한 심볼릭 링크를 생성합니다.
ln -s /etc/guacamole/guacamole.war /var/lib/tomcat8/webapps/
마지막으로 Tomcat 및 Guacamole 서비스를 다시 시작하여 새 웹 애플리케이션을 배포합니다.
systemctl restart tomcat8
systemctl restart guacd
구아코몰 구성
Guacamole을 설치한 후 Guacamole이 제대로 작동하려면 사용자 및 연결을 구성해야 합니다.
먼저 guacamole.properties라는 Guacamole 기본 구성 파일을 만듭니다.
nano /etc/guacamole/guacamole.properties
다음 줄을 추가합니다.
guacd-hostname: localhost
guacd-port:    4822
user-mapping:    /etc/guacamole/user-mapping.xml
파일을 저장하고 닫습니다. 그런 다음 다음 명령을 사용하여 lib 및 extensions 디렉터리를 만듭니다.
mkdir /etc/guacamole/{extensions,lib}다음으로 tomcat8 기본 구성 파일에 대한 과카몰리 홈 디렉토리 환경 변수입니다.
echo "GUACAMOLE_HOME=/etc/guacamole" >> /etc/default/tomcat8
Guacamoles 기본 인증 방법은 user-mapping.xml이라는 단일 파일에서 모든 사용자와 연결을 읽습니다. 이 파일은 Guacamole 웹 UI에 액세스할 수 있는 사용자, 연결할 서버 및 연결 방법을 정의합니다.
먼저 다음 명령을 사용하여 암호에 대한 md5 해시를 생성합니다.
echo -n yoursecurepassword | openssl md5
다음 출력이 표시되어야 합니다.
(stdin)= 55b38b03e7587a45fd886977842ff9b8
참고: 이 해시를 기억하고 user-mapping.xml 파일에 지정해야 합니다.
다음으로 다음 명령을 사용하여 새 user-mapping.xml을 만듭니다.
nano /etc/guacamole/user-mapping.xml
다음 줄을 추가합니다.
<user-mapping>
    <authorize
            username="admin"
            password="55b38b03e7587a45fd886977842ff9b8"
            encoding="md5">

        <connection name="Ubuntu-Server">
            <protocol>ssh</protocol>
            <param name="hostname">192.168.0.150</param>
            <param name="port">22<param>
            <param name="username">root</param>
        </connection>
        <connection name="Windows Server">
            <protocol>rdp</protocol>
            <param name="hostname">192.168.0.100</param>
            <param name="port">3389</param>
        </connection>
    </authorize>
</user-mapping>
완료되면 파일을 저장하고 닫습니다. 그런 다음 Tomcat 및 Guacamole 서비스를 다시 시작하여 변경 사항을 적용합니다.
systemctl restart tomcat8
systemctl restart guacd
Guacamole 웹 인터페이스에 액세스
이 시점에서 Guacamole 서버가 설치되고 구성됩니다. 이제 웹 브라우저를 통해 액세스할 시간입니다.
웹 브라우저를 열고 URL http://your-server-ip:8080/guacamole/을 입력합니다. Apache Guacamole 로그인 페이지로 리디렉션됩니다.
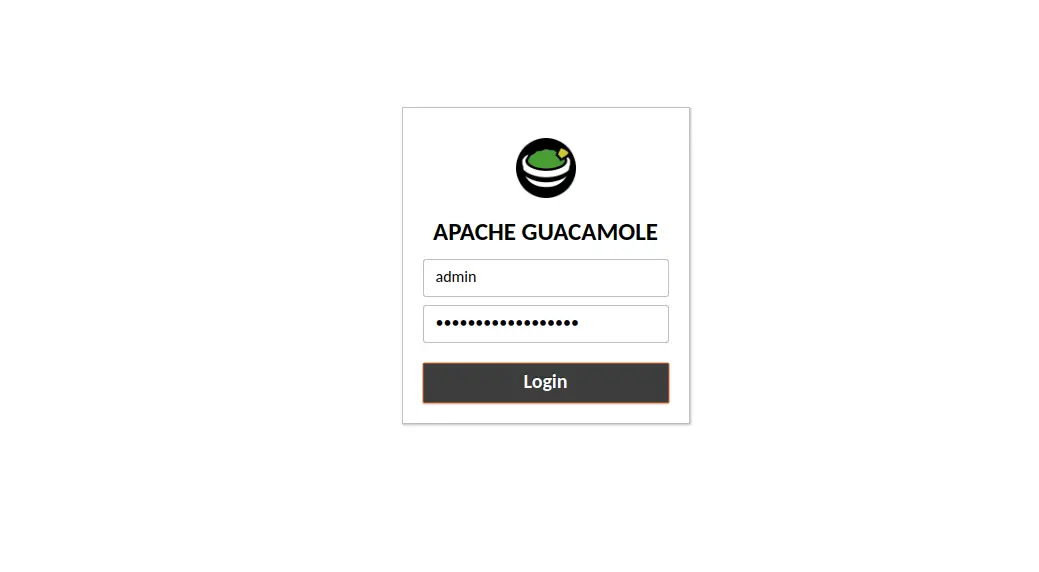
user-mapping.xml 파일에 지정한 사용자 이름과 비밀번호를 제공하고 로그인 버튼을 클릭합니다. 모든 연결이 포함된 Apache Guacamole 기본 대시보드가 표시되어야 합니다.
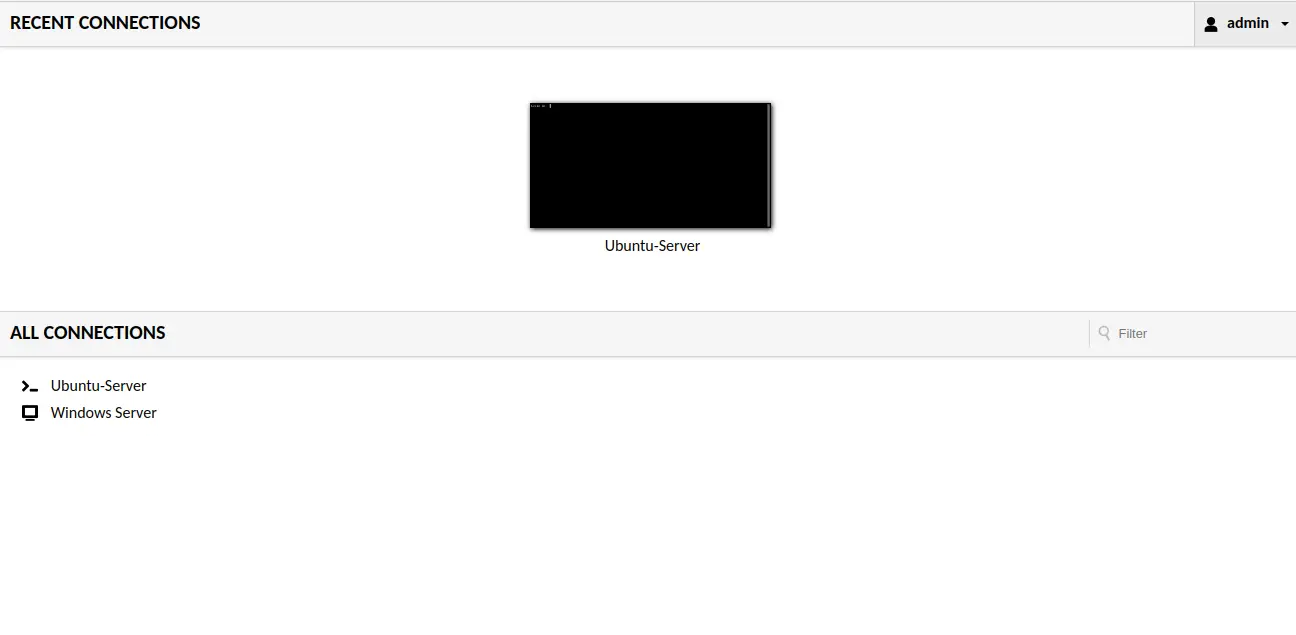
이제 Ubuntu-Server를 클릭하면 아래와 같이 user-mapping.xml에 정의한 사용자의 비밀번호를 입력하라는 메시지가 표시됩니다.
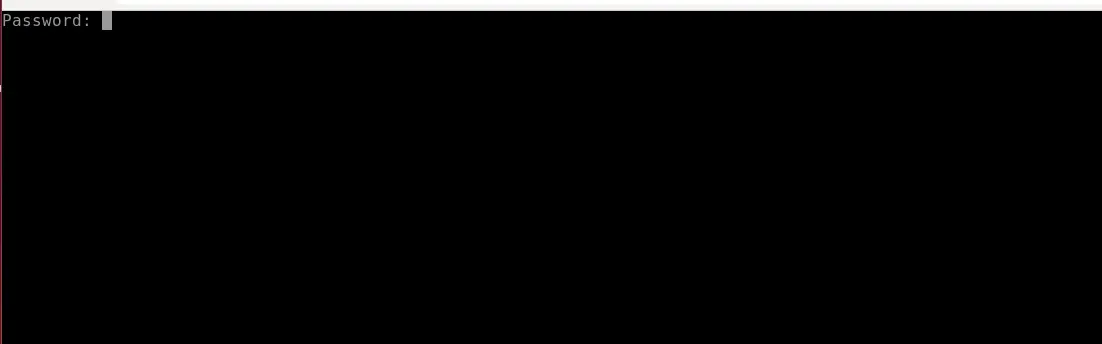
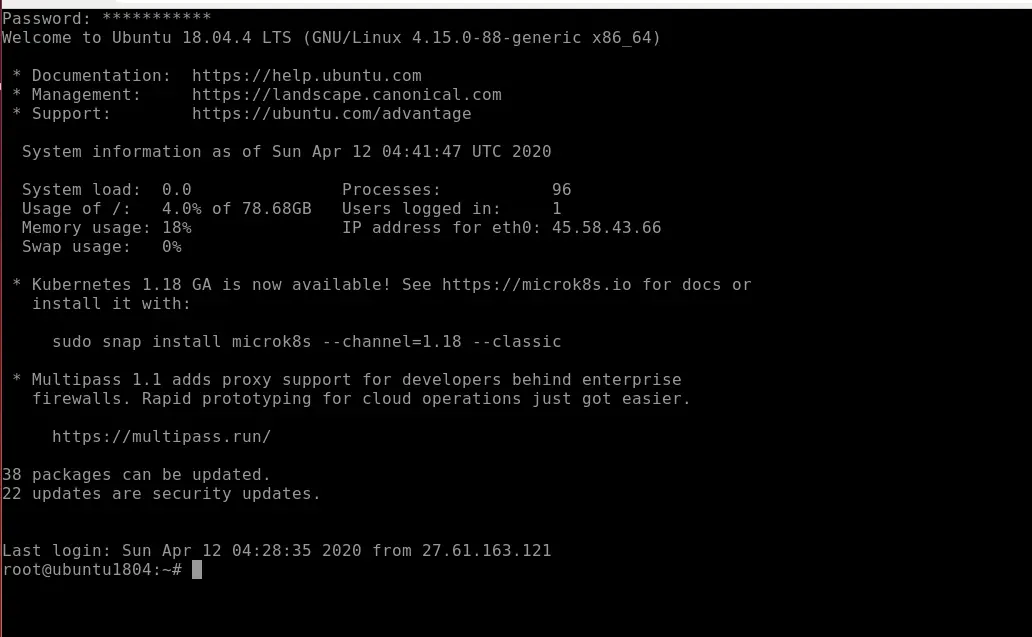
시스템 사용자 암호를 제공하고 Enter를 누르십시오. 아래와 같이 Ubuntu-Server에 로그인합니다.
Nginx를 Guacamole의 역방향 프록시로 구성
다음으로 Guacamole 대시보드에 액세스하려면 Nginx를 리버스 프록시로 구성해야 합니다. 먼저 다음 명령을 사용하여 Nginx 웹 서버를 설치합니다.
apt-get install nginx -y
설치가 완료되면 새 Nginx 가상 호스트 구성 파일을 만듭니다.
nano /etc/nginx/sites-available/guacamole.conf
다음 줄을 추가합니다.
server {
        listen 80;
        server_name your-server-ip;
        access_log  /var/log/nginx/guac_access.log;
        error_log  /var/log/nginx/guac_error.log;

        location / {
                    proxy_pass http://your-server-ip:8080/guacamole/;
                    proxy_buffering off;
                    proxy_http_version 1.1;
                    proxy_set_header X-Forwarded-For $proxy_add_x_forwarded_for;
                    proxy_set_header Upgrade $http_upgrade;
                    proxy_set_header Connection $http_connection;
                    proxy_cookie_path /guacamole/ /;
        }

}
완료되면 파일을 저장하고 닫습니다. 그런 다음 다음 명령을 사용하여 Nginx 가상 호스트를 활성화합니다.
ln -s /etc/nginx/sites-available/guacamole.conf /etc/nginx/sites-enabled/
다음으로 다음 명령을 사용하여 Nginx에서 구문 오류가 있는지 확인합니다.
nginx -t
다음 출력이 표시되어야 합니다.
nginx: the configuration file /etc/nginx/nginx.conf syntax is ok
nginx: configuration file /etc/nginx/nginx.conf test is successful
마지막으로 Nginx 서비스를 다시 시작하여 변경 사항을 적용합니다.
systemctl restart nginx
이제 URL http://your-server-ip를 사용하여 Guacamole 웹 인터페이스에 액세스할 수 있습니다.
결론
축하합니다! Ubuntu 18.04 서버에 Guacamole 원격 데스크톱 게이트웨이를 성공적으로 설치했습니다. 이제 웹 브라우저를 통해 원격으로 관리하려는 다른 원격 서버를 추가할 수 있습니다.