Nginx로 WordPress를 설치하고 CentOS 8에서 SSL을 암호화하는 방법
이 페이지에서
- 전제 조건
- 시작하기\n
- LEMP 서버 설치
- WordPress 데이터베이스 구성
- 워드프레스 다운로드\n
- WordPress용 Nginx 구성
- WordPress 대시보드 액세스
- Lets Encrypt로 WordPress 보안 유지
- 자동 갱신을 암호화하도록 설정\n
- 결론
WordPress는 세계에서 가장 널리 사용되는 무료 오픈 소스 콘텐츠 관리 시스템입니다. 블로그, 포트폴리오 웹 사이트 및 전자 상거래 플랫폼을 호스팅하는 데 사용할 수 있는 매우 강력한 블로깅 플랫폼입니다. WordPress는 Apache/Nginx를 웹 서버로, MariaDB/MySQL을 데이터베이스로 사용하고 PHP 처리를 사용합니다. WordPress는 기능을 사용자 정의하는 데 사용할 수 있는 수많은 테마와 플러그인을 제공합니다.
이 튜토리얼에서는 CentOS 8 서버에 Nginx와 함께 WordPress를 설치하는 방법을 설명하고 무료 Lets Encrypt SSL 인증서를 사용하여 서버를 보호합니다.
전제 조건
- CentOS 8을 실행하는 서버.\n
- 서버에 루트 암호가 구성되어 있습니다.\n
- 유효한 도메인 이름은 서버 IP 주소를 가리킵니다.\n
시작하기
기본적으로 SELinux는 CentOS 8 서버에서 활성화되어 있습니다. 따라서 먼저 비활성화해야 합니다.
/etc/selinux/config 파일을 편집하여 이를 수행할 수 있습니다.
nano /etc/selinux/config
다음과 같이 변경합니다.
SELINUX=disabled
파일을 저장하고 닫습니다. 그런 다음 서버를 다시 시작하여 변경 사항을 적용하십시오.
LEMP 서버 설치
시작하기 전에 서버에 Nginx, MariaDB, PHP 및 기타 필수 패키지를 설치해야 합니다. 다음 명령을 실행하여 모두 설치할 수 있습니다.
yum install nginx php php-cli php-curl php-zip php-mbstring php-mysqlnd php-fpm curl unzip mariadb-server -y
모든 패키지가 설치되면 Nginx, PHP-FPM, MariaDB 서비스를 시작하고 시스템 재부팅 후 시작할 수 있도록 활성화합니다.
systemctl start nginx
 systemctl enable nginx
 systemctl start mariadb
 systemctl enable mariadb
 systemctl start php-fpm
 systemctl enable php-fpm
다음 명령을 사용하여 PHP-FPM 서비스의 상태를 확인할 수도 있습니다.
systemctl status php-fpm
다음과 같은 결과가 표시되어야 합니다.
? php-fpm.service - The PHP FastCGI Process Manager
   Loaded: loaded (/usr/lib/systemd/system/php-fpm.service; disabled; vendor preset: disabled)
   Active: active (running) since Thu 2019-10-17 05:39:11 EDT; 4min 40s ago
 Main PID: 1475 (php-fpm)
   Status: "Processes active: 0, idle: 5, Requests: 0, slow: 0, Traffic: 0req/sec"
    Tasks: 6 (limit: 5060)
   Memory: 28.5M
   CGroup: /system.slice/php-fpm.service
           ??1475 php-fpm: master process (/etc/php-fpm.conf)
           ??1478 php-fpm: pool www
           ??1479 php-fpm: pool www
           ??1480 php-fpm: pool www
           ??1481 php-fpm: pool www
           ??1482 php-fpm: pool www

Oct 17 05:39:10 centos8 systemd[1]: Starting The PHP FastCGI Process Manager...
Oct 17 05:39:11 centos8 systemd[1]: Started The PHP FastCGI Process Manager.
완료되면 다음 단계로 진행할 수 있습니다.
WordPress 데이터베이스 구성
기본적으로 MariaDB 서버는 보안되지 않습니다. 따라서 먼저 보안을 유지해야 합니다. 다음 명령으로 보안을 유지할 수 있습니다.
mysql_secure_installation
아래와 같이 모든 질문에 답하십시오.
Enter current password for root (enter for none):
Set root password? [Y/n] n
Remove anonymous users? [Y/n] Y
Disallow root login remotely? [Y/n] Y
Remove test database and access to it? [Y/n] Y
Reload privilege tables now? [Y/n] Y
보안이 설정되면 다음과 같은 결과가 표시됩니다.
Cleaning up...

All done!  If you've completed all of the above steps, your MariaDB
installation should now be secure.

Thanks for using MariaDB!
그런 다음 다음 명령을 사용하여 MariaDB 셸에 로그인합니다.
mysql -u root -p
프롬프트가 표시되면 루트 비밀번호를 제공하고 다음 명령을 사용하여 WordPress용 데이터베이스 및 사용자를 생성합니다.
MariaDB [(none)]> CREATE DATABASE wpdb;
 MariaDB [(none)]> GRANT ALL PRIVILEGES on wpdb.* to 'wpuser'@'localhost' identified by 'password';
그런 다음 권한을 플러시하고 다음 명령을 사용하여 MariaDB 셸을 종료합니다.
MariaDB [(none)]> FLUSH PRIVILEGES;
 MariaDB [(none)]> EXIT;
데이터베이스가 구성되면 다음 단계를 진행할 수 있습니다.
워드프레스 다운로드
다음 명령을 사용하여 최신 버전의 WordPress를 다운로드할 수 있습니다.
cd /var/www/html
 wget https://wordpress.org/latest.tar.gz
다운로드가 완료되면 다음 명령을 사용하여 다운로드한 파일의 압축을 풉니다.
tar -xvzf latest.tar.gz
다음으로 wordpress 디렉토리의 소유권을 nginx로 변경합니다.
chown -R nginx: /var/www/html/wordpress/
다음으로 디렉토리를 wordpress로 변경하고 wordpress 기본 구성 파일의 이름을 바꿉니다.
cd /var/www/html/wordpress
 cp wp-config-sample.php wp-config.php
다음으로 원하는 텍스트 편집기에서 wp-config.php 파일을 편집합니다.
nano wp-config.php
아래와 같이 데이터베이스 정보를 정의합니다.
/** The name of the database for WordPress */
define( 'DB_NAME', 'wpdb' );

/** MySQL database username */
define( 'DB_USER', 'wpuser' );

/** MySQL database password */
define( 'DB_PASSWORD', 'password' );

/** MySQL hostname */
define( 'DB_HOST', 'localhost' );
완료되면 파일을 저장하고 닫습니다.
WordPress용 Nginx 구성
다음으로 WordPress를 제공하기 위해 Nginx 가상 호스트 구성 파일을 생성해야 합니다. 다음 명령으로 만들 수 있습니다.
nano /etc/nginx/conf.d/wordpress.conf
다음 줄을 추가합니다.
server {
    listen 80;
    server_name example.com;
    root /var/www/html/wordpress;
    index index.php;

    access_log /var/log/nginx/example.com.access.log;
    error_log /var/log/nginx/example.com.error.log;

    location = /favicon.ico {
        log_not_found off;
        access_log off;
    }

    location = /robots.txt {
        allow all;
        log_not_found off;
        access_log off;
    }

    location / {
        try_files $uri $uri/ /index.php?$args;
    }

    location ~ \.php$ {
        try_files $uri =404;
        fastcgi_pass unix:/run/php-fpm/www.sock;
        fastcgi_index   index.php;
        fastcgi_param SCRIPT_FILENAME $document_root$fastcgi_script_name;
        include fastcgi_params;
    }
    location ~* \.(js|css|png|jpg|jpeg|gif|ico|svg)$ {
        expires max;
        log_not_found off;
    }

}
파일을 저장하고 닫습니다. 그런 다음 다음 명령을 사용하여 구문 오류가 있는지 nginx를 확인합니다.
nginx -t
다음과 같은 결과가 표시되어야 합니다.
nginx: the configuration file /etc/nginx/nginx.conf syntax is ok
nginx: configuration file /etc/nginx/nginx.conf test is successful
마지막으로 Nginx 서비스를 다시 시작하여 구성 변경 사항을 적용합니다.
systemctl restart nginx
WordPress 대시보드에 액세스
WordPress가 설치 및 구성되었으므로 이제 웹 인터페이스에 액세스할 차례입니다.
웹 브라우저를 열고 URL http://example.com을 입력합니다. 다음 페이지로 리디렉션됩니다.

사이트 이름, 관리자 사용자 이름, 비밀번호, 관리자 이메일과 같은 모든 필수 정보를 제공하고 WordPress 설치 버튼을 클릭합니다. 일단 설치가 완료되었습니다. 다음 페이지가 표시됩니다.

로그인 버튼을 클릭합니다. WordPress 로그인 페이지로 리디렉션됩니다.

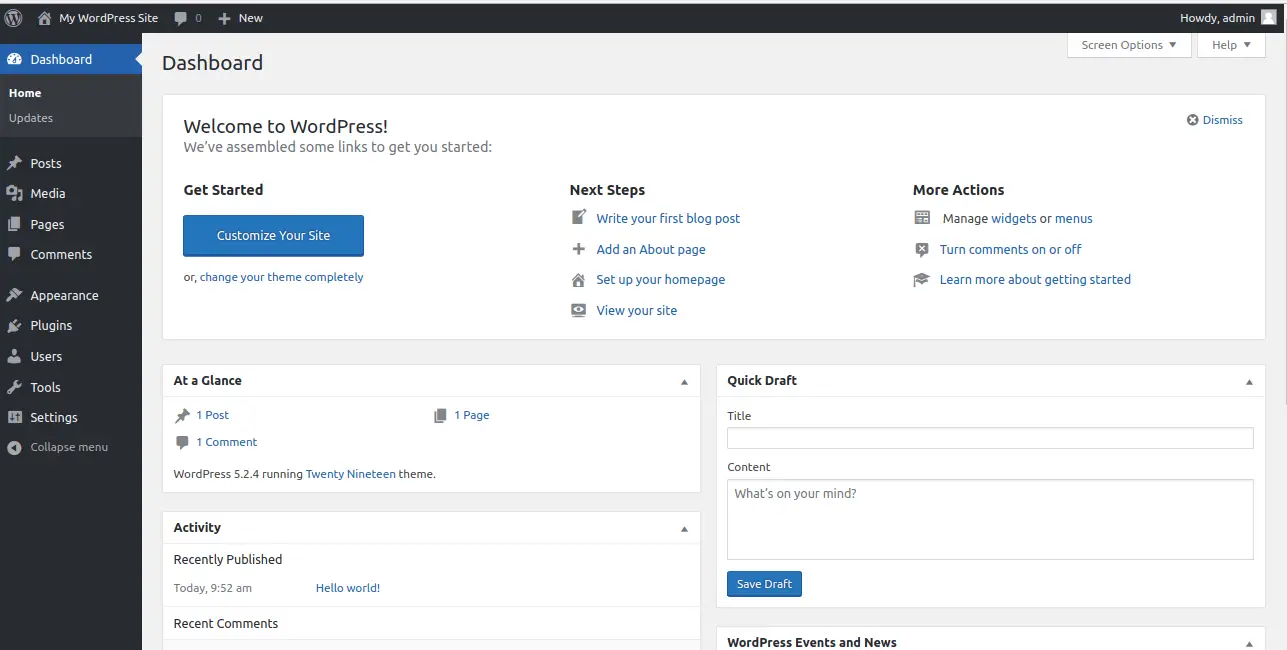
관리자 사용자 이름, 암호를 제공하고 로그인 버튼을 클릭합니다. 다음 페이지에 WordPress 대시보드가 표시되어야 합니다.
Lets Encrypt로 안전한 WordPress
Lets Encrypt 무료 SSL로 WordPress 사이트를 보호하려면 시스템에 Certbot Lets Encrypt 클라이언트를 설치해야 합니다. 기본적으로 Certbot은 CentOS 8 기본 리포지토리에서 사용할 수 없습니다. 따라서 Certbot 공식 웹사이트에서 다운로드해야 합니다.
다음 명령을 사용하여 Certbot을 다운로드하고 설치할 수 있습니다.
wget https://dl.eff.org/certbot-auto
 mv certbot-auto /usr/local/bin/certbot-auto
 chown root /usr/local/bin/certbot-auto
 chmod 0755 /usr/local/bin/certbot-auto
이제 다음 명령을 실행하여 WordPress 웹 사이트에 대한 SSL 인증서를 가져와 설치합니다.
certbot-auto --apache -d example.com
이메일 주소를 제공하고 서비스 약관에 동의하라는 메시지가 표시됩니다. HTTP 트래픽을 HTTPS로 리디렉션할지 여부도 선택해야 합니다. 적절한 옵션을 선택하고 Enter 키를 누르십시오. 설치가 성공적으로 완료되면 다음과 같은 결과가 표시됩니다.
IMPORTANT NOTES:
 - Congratulations! Your certificate and chain have been saved at:
   /etc/letsencrypt/live/example.com/fullchain.pem
   Your key file has been saved at:
   /etc/letsencrypt/live/example.com/privkey.pem
   Your cert will expire on 2019-08-14. To obtain a new or tweaked
   version of this certificate in the future, simply run certbot again
   with the "certonly" option. To non-interactively renew *all* of
   your certificates, run "certbot renew"
 - If you like Certbot, please consider supporting our work by:

   Donating to ISRG / Let's Encrypt:   https://letsencrypt.org/donate
   Donating to EFF:                    https://eff.org/donate-le
Lets Encrypt 자동 갱신 설정
Encrypt 인증서는 90일 동안 유효합니다. 따라서 만료되기 전에 인증서를 갱신하는 것이 좋습니다. 인증서를 자동으로 갱신하도록 Cron 작업을 설정할 수 있습니다.
이렇게 하려면 다음 명령을 사용하여 crontab을 만듭니다.
crontab -e
다음 줄을 추가합니다.
0 0,12 * * * root python -c 'import random; import time; time.sleep(random.random() * 3600)' && /usr/local/bin/certbot-auto renew
완료되면 파일을 저장하고 닫습니다.
결론
위의 튜토리얼에서는 CentOS 서버에서 Nginx로 WordPress를 설치하고 구성하는 방법을 배웠습니다. Lets Encrypt 무료 SSL로 WordPress 사이트를 보호하는 방법도 배웠습니다. 이제 나만의 WordPress 웹사이트를 쉽게 호스팅할 수 있기를 바랍니다.