FreeBSD에서 FAMP 스택과 함께 WordPress를 설치하는 방법
이 튜토리얼에서는 FreeBSD의 FAMP 스택에 WordPress를 설치하는 방법을 배웁니다. FAMP 스택은 FreeBSD Unix 운영 체제, Apache HTTP 서버(인기 있는 오픈 소스 웹 서버), >MariaDB 관계형 데이터베이스 관리 시스템(현재 커뮤니티에서 관리하는 MySQL 데이터베이스 포크) 및 서버 측에서 실행되는 PHP 동적 프로그래밍 언어입니다.
WordPress는 간단한 블로그나 전문 웹사이트를 구축하는 데 사용되는 세계에서 가장 유명한 CMS 프레임워크입니다.
요구사항
- FreeBSD 설치 가이드
1단계: FreeBSD에 FAMP 스택 설치
1. WordPress 웹사이트를 귀하의 사업장에 배포하려면 다음 FAMP 구성 요소가 FreeBSD에 설치되어 작동하는지 확인해야 합니다.
FreeBSD에 설치해야 할 첫 번째 서비스는 Apache HTTP 서버입니다. 공식 FreeBSD 포트 저장소를 통해 Apache 2.4 HTTP 서버 바이너리 패키지를 설치하려면 서버 콘솔에서 다음 명령을 실행하세요.
pkg install apache24
2. 다음으로, 다음 명령을 실행하여 FreeBSD에서 Apache HTTP 데몬을 활성화하고 시작합니다.
sysrc apache24_enable="yes"
service apache24 start
3. 브라우저를 열고 HTTP 프로토콜을 통해 서버의 IP 주소 또는 FQDN으로 이동하여 Apache 기본 웹페이지를 봅니다. '작동합니다!' 메시지가 브라우저에 표시되어야 합니다.
http://yourdomain.tld
4. 다음으로, 아래 명령을 실행하여 아래 필수 확장 기능을 사용하여 서버에 PHP 7.1 버전을 설치합니다. 우리의 WordPress 웹사이트는 이 PHP 버전 위에 배포될 것입니다.
pkg install php71 php71-mysqli mod_php71 php71-mbstring php71-gd php71-json php71-mcrypt php71-zlib php71-curl
5. 다음 단계에서는 다음 내용으로 Apache 웹 서버용 php.conf 구성 파일을 만듭니다.
nano /usr/local/etc/apache24/Includes/php.conf
php.conf 파일에 다음 구성을 추가합니다.
<IfModule dir_module>
    DirectoryIndex index.php index.html
    <FilesMatch "\.php$">
        SetHandler application/x-httpd-php
    </FilesMatch>
    <FilesMatch "\.phps$">
        SetHandler application/x-httpd-php-source
    </FilesMatch>
</IfModule>
6. 아래 명령을 실행하여 변경 사항을 적용하려면 이 파일을 저장하고 닫은 후 Apache 데몬을 다시 시작하세요.
service apache24 restart
7. 누락된 마지막 구성요소는 MariaDB 데이터베이스입니다. FreeBSD에 최신 버전의 MariaDB 데이터베이스 서버를 설치하려면 다음 명령을 실행하십시오.
pkg install mariadb102-client mariadb102-server
8. 다음으로, 아래 명령을 실행하여 FreeBSD에서 MariaDB 서비스를 활성화하고 데이터베이스 데몬을 시작합니다.
sysrc mysql_enable="YES"
service mysql-server start
9. 다음 단계에서는 MariaDB를 보호하기 위해 mysql_secure_installation 스크립트를 실행합니다. MariaDB 데이터베이스를 보호하려면 아래 스크립트 출력 샘플을 사용하십시오.
/usr/local/bin/mysql_secure_installation
샘플 출력
NOTE: RUNNING ALL PARTS OF THIS SCRIPT IS RECOMMENDED FOR ALL MariaDB
      SERVERS IN PRODUCTION USE!  PLEASE READ EACH STEP CAREFULLY!

In order to log into MariaDB to secure it, we'll need the current
password for the root user.  If you've just installed MariaDB, and
you haven't set the root password yet, the password will be blank,
so you should just press enter here.

Enter current password for root (enter for none):
OK, successfully used password, moving on...

Setting the root password ensures that nobody can log into the MariaDB
root user without the proper authorisation.
Set root password? [Y/n] y
New password:
Re-enter new password:
Password updated successfully!
Reloading privilege tables..
 ... Success!
By default, a MariaDB installation has an anonymous user, allowing anyone
to log into MariaDB without having to have a user account created for
them.  This is intended only for testing, and to make the installation
go a bit smoother.  You should remove them before moving into a
production environment.
Remove anonymous users? [Y/n] y
 ... Success!
Normally, root should only be allowed to connect from 'localhost'.  This
ensures that someone cannot guess at the root password from the network.
Disallow root login remotely? [Y/n] y
 ... Success!
By default, MariaDB comes with a database named 'test' that anyone can
access.  This is also intended only for testing, and should be removed
before moving into a production environment.
Remove test database and access to it? [Y/n] y
 - Dropping test database...
 ... Success!
 - Removing privileges on test database...
 ... Success!
Reloading the privilege tables will ensure that all changes made so far
will take effect immediately.
Reload privilege tables now? [Y/n] y
 ... Success!
Cleaning up...
All done!  If you've completed all of the above steps, your MariaDB
installation should now be secure.
Thanks for using MariaDB!
10. 마지막으로 MariaDB 서버에 WordPress 설치 데이터베이스를 만듭니다. 데이터베이스를 생성하려면 MariaDB 콘솔에 로그인하고 다음 명령을 실행하십시오.
이 데이터베이스를 설명하는 이름을 선택하고 이 데이터베이스를 관리하기 위한 데이터베이스 사용자 및 비밀번호를 생성하십시오.
mysql -u root -p
MariaDB [(none)]> create database wordpress;
MariaDB [(none)]> grant all privileges on wordpress.* to 'user_wordpress'@'localhost' identified by 'password';
MariaDB [(none)]> flush privileges;
2단계: FreeBSD에 워드프레스 설치
11. FreeBSD에 최신 버전의 WordPress를 설치하려면 WordPress 다운로드 페이지로 이동하여 wget 유틸리티의 도움으로 사용 가능한 최신 traball 버전을 다운로드하세요.
다음 명령을 실행하여 tarball을 추출하고 모든 WordPress 설치 파일을 Apache 문서 루트에 복사합니다.
wget https://wordpress.org/latest.tar.gz
tar xfz latest.tar.gz
cp -rf wordpress/* /usr/local/www/apache24/data/
12. 그런 다음 아래 명령을 실행하여 Apache www 그룹에 WordPress 설치 디렉터리에 대한 쓰기 권한을 부여합니다.
chown -R root:www /usr/local/www/apache24/data/
chmod -R 775 /usr/local/www/apache24/data/
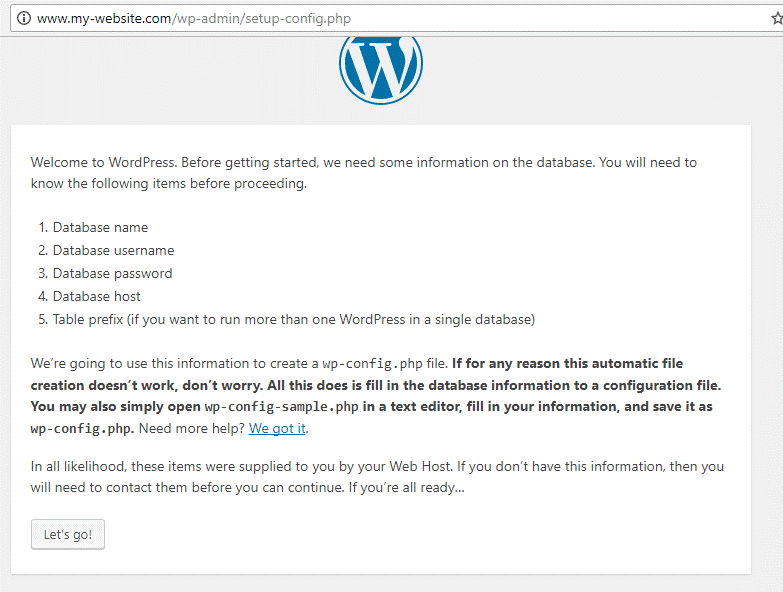
13. 이제 WordPress 설치를 시작합니다. 브라우저를 열고 HTTP 프로토콜을 통해 서버 IP 주소 또는 도메인 이름으로 이동합니다. 첫 번째 화면에서 가자! 버튼을 눌러 설치 과정을 시작합니다.
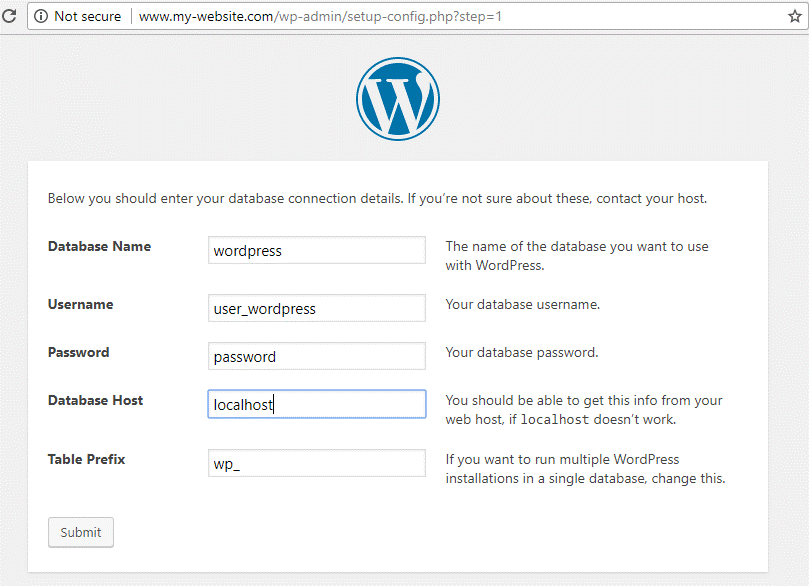
14. 다음으로, 아래 스크린샷에 표시된 대로 MySQL 데이터베이스 이름, 사용자 및 비밀번호를 추가하고 제출 버튼을 눌러 계속 진행하세요.
15. 다음 화면에서 WordPress 설치 프로그램은 MySQL 데이터베이스에 성공적으로 연결할 수 있음을 알려줍니다. 데이터베이스 스키마를 설치하려면 설치 실행 버튼을 누르세요.

16. 다음 화면에서 사이트 제목과 강력한 비밀번호가 포함된 사용자 이름을 선택하여 WordPress 사이트를 관리하세요. 또한 이메일 주소를 추가하고 WordPress 설치 버튼을 눌러 설치 프로세스를 완료하세요.

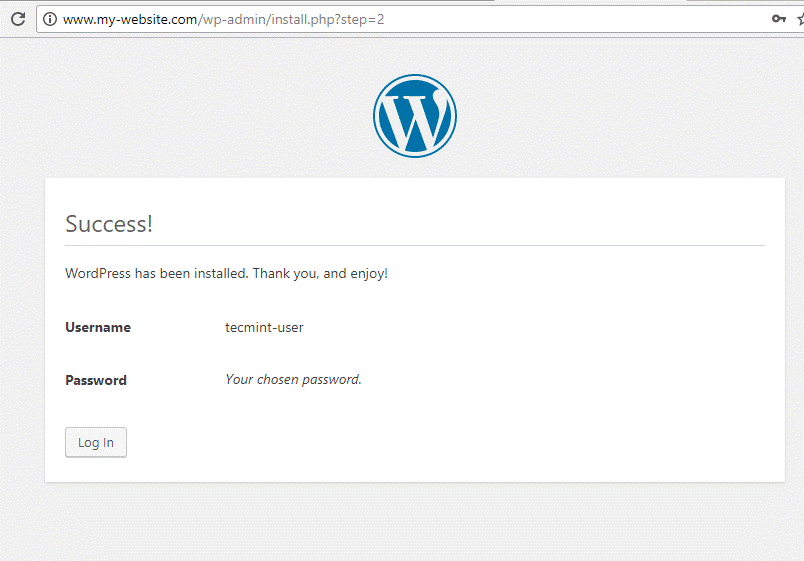
17. 설치 프로세스가 완료되면 WordPress CMS가 성공적으로 설치되었다는 메시지가 표시됩니다. 이 페이지에서는 아래 이미지에 설명된 것처럼 웹사이트 관리 패널에 로그인하는 데 필요한 자격 증명도 찾을 수 있습니다.
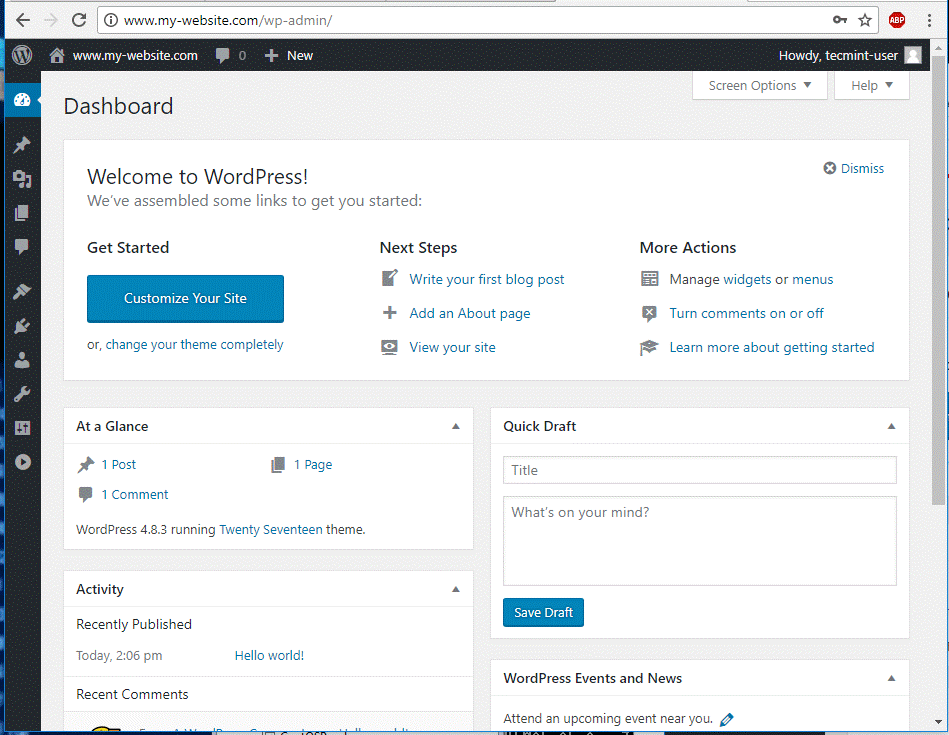
18. 마지막으로 이전 단계에서 제공된 자격 증명을 사용하여 WordPress 관리 대시보드에 로그인하면 이제 웹사이트에 새 게시물을 추가할 수 있습니다.
19. 웹사이트 프런트엔드 페이지를 방문하려면 그림과 같이 "Hello World!"라는 기본 게시물이 표시되는 서버 IP 주소 또는 도메인 이름으로 이동하세요. 아래 이미지에서.
http://yourdomain.tld
축하해요! FreeBSD의 FAMP 스택에 WordPress 콘텐츠 관리 시스템을 성공적으로 설치했습니다.