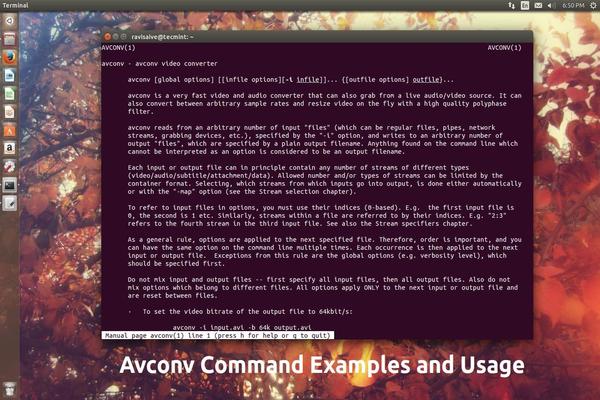
Linux 터미널에서 비디오 및 오디오를 녹화, 변환 및 추출하는 11가지 'Avconv' 명령
이전 기사에서는 'Avconv' 도구를 사용하여 데스크탑 비디오 및 오디오를 녹화하는 방법에 대해 이야기했습니다. 멀티미디어 스트림과 파일을 처리하기 위해 “avconv” 도구를 사용하는 다른 방법이 많이 있다고 언급했습니다.
- 'Avconv' 명령을 사용하여 데스크탑 비디오 및 오디오 녹화

이 글에서는 “avconv” 프로그램과 함께 사용할 가장 중요한 10가지 명령을 알아보겠습니다.
확실히 하려면 “avconv” 도구를 설치해야 Debian/Ubuntu/Mint에 설치하고 다음 명령을 실행하세요:
sudo apt-get update
sudo apt-get install libav-tools
1. 비디오 및 오디오 파일 정보 얻기
멀티미디어 파일에 대한 정보를 얻으려면 avcon 명령과 함께 '-i'(정보) 옵션을 사용하여 다음 명령을 실행하고 오디오 또는 비디오 파일을 입력하십시오.
avconv -i Michael-Jackson-You-Rock-My-World-HD.mp4

avconv version 11-6:11-1, Copyright (c) 2000-2014 the Libav developers
  built on Sep 26 2014 14:34:54 with gcc 4.9.1 (Ubuntu 4.9.1-15ubuntu1)
Input #0, mov,mp4,m4a,3gp,3g2,mj2, from 'Michael-Jackson-You-Rock-My-World-HD.mp4':
  Metadata:
    major_brand     : mp42
    minor_version   : 0
    compatible_brands: isommp42
    creation_time   : 2013-12-04 15:45:45
  Duration: 00:09:43.05, start: 0.000000, bitrate: 1898 kb/s
    Stream #0.0(und): Video: h264 (High), yuv420p, 1280x720, 1703 kb/s, 29.97 fps, 60k tbn, 59.94 tbc (default)
    Stream #0.1(und): Audio: aac, 44100 Hz, stereo, fltp, 192 kb/s (default)
    Metadata:
      creation_time   : 2013-12-04 15:46:06
At least one output file must be specified

2. 비디오 파일에서 오디오 추출
비디오 파일에서만 오디오를 추출하고 이를 다른 파일로 출력하려면 다음 명령을 실행하면 됩니다.
avconv -i Michael-Jackson-You-Rock-My-World-HD.mp4 -vn -f wav sound.wav
위 명령에 대한 몇 가지 사항은 다음과 같습니다.
- 입력 파일 이름을 비디오 파일 이름으로 바꾸는 것을 잊지 마십시오.
- -vn은 멀티미디어 파일에서 비디오를 제거하는 데 사용하는 옵션입니다.
- -f wav는 출력 파일에서 사용할 형식입니다. 원하는 경우 “mp3” 또는 “webm”으로 전환할 수 있습니다.
- sound.wav는 출력 파일의 이름입니다.

3. 오디오 파일에서 비디오 추출
다음 명령을 사용하면 비디오와 오디오가 모두 포함된 멀티미디어 파일에서만 비디오를 추출할 수도 있습니다.
avconv -i You-Rock-My-World.avi -vcodec libx264 -an -f mp4 video.mp4
위 명령에 대한 설명:
- -an은 파일에서 오디오를 삭제하는 옵션입니다.
- mp4는 새 파일에 사용하려는 형식입니다. “mkv”, “ogg” 등으로 변경할 수 있습니다. 기억하세요. “video.mp4”를 “로 변경해야 합니다. video.mkv”도 마찬가지입니다.

4. .avi를 .mkv 형식으로 변환
.avi 파일을 .mkv 형식으로 변환하려면 다음 명령을 사용하세요.
avconv -i You-Rock-My-World.avi -vcodec libx264 You-Rock-My-World.mkv
- -i source-file.avi는 변환하려는 파일입니다(-i=-input).
- -vcodec은 변환을 처리하는 동안 사용할 비디오 코덱을 선택하는 데 사용하는 옵션입니다. 우리의 경우 "libx264 "입니다. 이 옵션은 비디오 품질을 그대로 유지하는 데 중요합니다. .
- newfile.mkv는 출력 파일 이름입니다.

5. .mp4를 avi 형식으로 변환
n개의 .mp4 파일을 .avi 형식으로 변환하려면 다음 명령을 실행하세요.
avconv -i Michael-Jackson-You-Rock-My-World-HD.mp4 -vcodec libx264 newfile.avi

6. .mp3를 .wav 형식으로 변환
여기에는 새로운 것이 없습니다.. 파일을 입력하고 다른 파일을 출력했습니다 :) 여기서는 오디오 파일을 다른 오디오로 변환하기 때문에 -vcodec libx264 옵션을 사용할 필요가 없습니다. 파일이 없습니다. 여기에는 동영상이 없습니다.
avconv -i michael-jackson-dangerous.mp3 newfile.wav

7. .yuv를 .avi 형식으로 변환
원하는 경우 이전 명령에서 필요에 따라 형식을 변경할 수 있습니다. 선택한 형식이 Libav에서 지원되는지 확인하세요.
avconv -i oldfile.yuv newfile.avi
8. 비디오와 오디오를 함께 병합
비디오 파일을 오디오 파일과 함께 병합하려면 다음 명령을 실행하십시오.
avconv -i the-sound-file.wav -i the-video-file.avi the-output-file.mkv
“the-output-file.mkv”를 “the-output-file.avi” 또는 Libav에서 지원하는 다른 형식으로 바꿀 수 있습니다. 모든 것을 직접 시도해 보세요!).
9. 비디오를 이미지로 변환
비디오 파일을 여러 다른 이미지로 변환하려면 다음 명령을 실행할 수 있습니다.
avconv -i Michael-Jackson-You-Rock-My-World-HD.mp4 -r 1 -s 1366x768 -f image2 image-%03d.png
- -r 1: 이미지당 원하는 프레임 수이며, 많을수록 더 많은 이미지가 생성됩니다.
- 1366×768: 이미지에 대해 원하는 너비와 높이입니다. 원하는 다른 크기로 바꿀 수 있습니다.
- image-%03d.png: 이미지 이름 형식입니다. 명령을 시도하면 “image-001.png”, “image-002.png”와 같은 많은 이미지가 생성됩니다.. 등, 원하는 경우 "png"를 "jpg" 또는 "jpeg"로 바꿀 수 있습니다.


10. Libav와 함께 사용할 수 있는 추가 옵션
Libav에는 "필터"라는 놀라운 기능이 있습니다. 필터를 사용하면 멀티미디어 파일에 많은 훌륭한 작업을 수행할 수 있습니다. 예를 들어, 다음 명령을 사용하십시오.
avconv -i input-video.avi -vcodec libx264 -vf "drawbox=x=50:y=50:width=400:height=300:[email " output-video.avi
- -vf: 비디오 필터를 적용하는 옵션입니다(오디오 필터를 사용하려면 -af로 바꾸십시오).
- drawbox=x=50:y=50:width=400:height=300:[email : 여기서는 너비가 400이고 높이가 300인 빨간색 상자를 그리는 'drawbox'라는 필터를 적용했습니다. x=50, y=50에서.
위 명령의 결과는 다음과 같습니다.

예를 들어 다음 명령을 사용하십시오.
avconv -i input-file.avi -vcodec libx264 -vf "transpose=cclock" output-file.avi
- transpose=cclock은 동영상을 시계 방향으로 90도 회전시키는 동영상 필터입니다.
다음은 귀하가 얻을 수 있는 이미지입니다.

11. tty를 비디오로 녹화하기
이 명령은 루트 사용자가 사용해야 하며, 프레임 버퍼 장치(fbdev)에 대한 액세스가 필요하기 때문에 sudo 없이는 작동하지 않습니다. fbdev는 Linux 프레임 버퍼 입력 장치이며, 이 장치는 콘솔에 그래픽을 표시하는 역할을 하는 장치입니다.
sudo avconv -f fbdev -r 30 -i /dev/fb0 out.avi
- * -r 30: 초당 프레임 수입니다.
- * -i /dev/fb0: 실행 중인 파일 장치 노드입니다. 이 옵션을 사용하면 tty에서 비디오를 캡처할 수 있습니다.
놀랍지 않나요? avconv를 사용하는 다른 많은 방법 외에도 멀티미디어 파일에 사용할 수 있는 좋은 필터가 많이 있습니다. 공식 문서에서 모두 확인할 수 있습니다.
Avconv 명령 사용법
이전에 Libav의 사전 사용을 시도해 보셨나요? 당신이 그것에 대해 어떻게 생각하십니까? avconv에 대한 다른 중요한 명령이 있습니까? 댓글로 공유해주세요!